IPv6 is a most recent version of internet protocol. It was indeed to replace the commonly used internet protocol IPv4. In the modern internet world, most of the people are switching their network to IPV6 because of the advantages it provides:
- More Efficient Routing
- More Efficient Packet Processing
- Security
- Simplified Network Configuration
- IPv6 has more addresses
So now let’s see how we can setup Amazon AWS EC2 with IPv6 address. First, you have to launch an instance with preferred EC2 type. Here, we have chosen free tier t2.micro.
Launch an Instance
Click edit button to change this text.
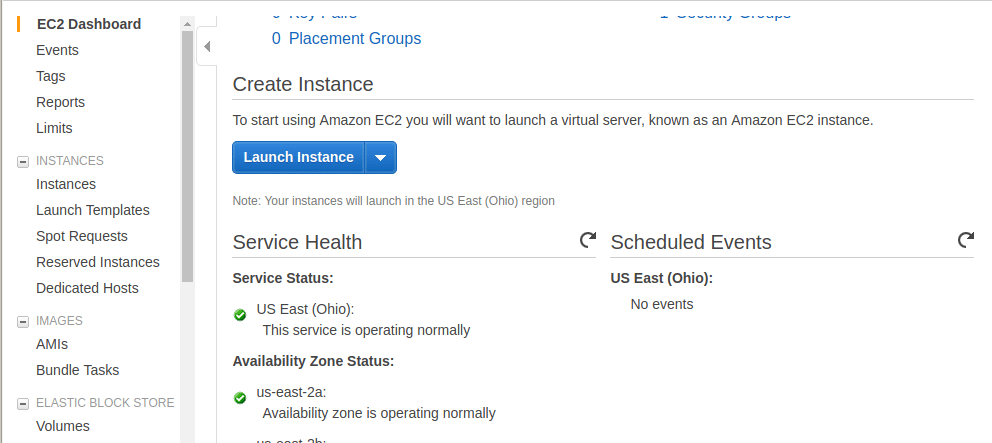
Fig 1. Launch an instance
Click on launch instance. Then, Select the AMI as you wish.

Fig 2. Choose AMI
On the next window, you can choose the Instance Type, like t2.micro, t2.medium etc. So you can choose the instance type based on your requirement. Once you have selected your instance type, then click on Next: Configure instance details.
On the very next window you can see the instance configuration details, If you want to change parameters you can change it. Otherwise move on to Next Add Storage.
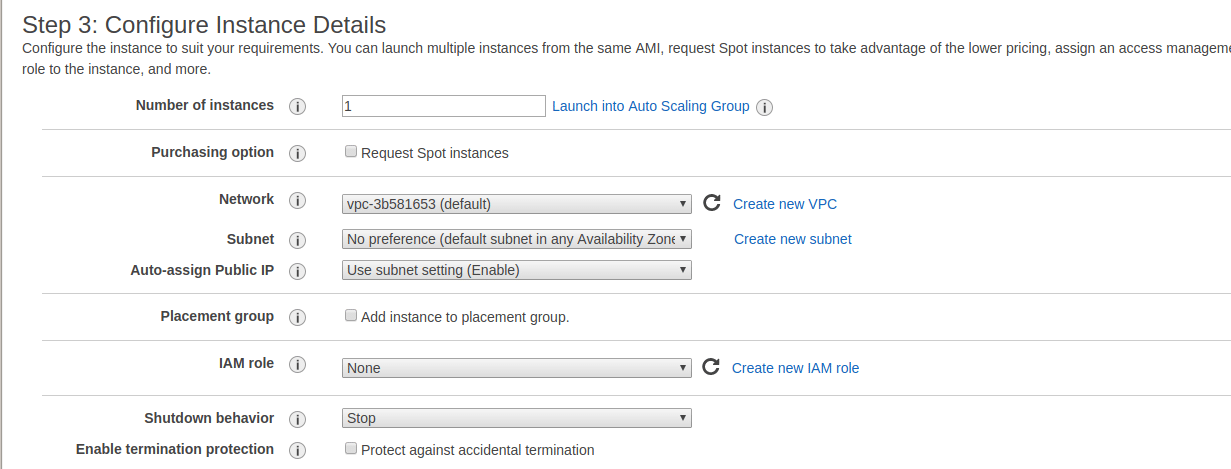
Fig 3. Configure instance details
So in this window, you can increase the storage. By default, EC2 has 8 GB. They will provide up to 30 GB as free if it’s a new account with free tier t2.micro.
If you want more storage, you can increase disk size or you can add new EBS volume to your EC2.
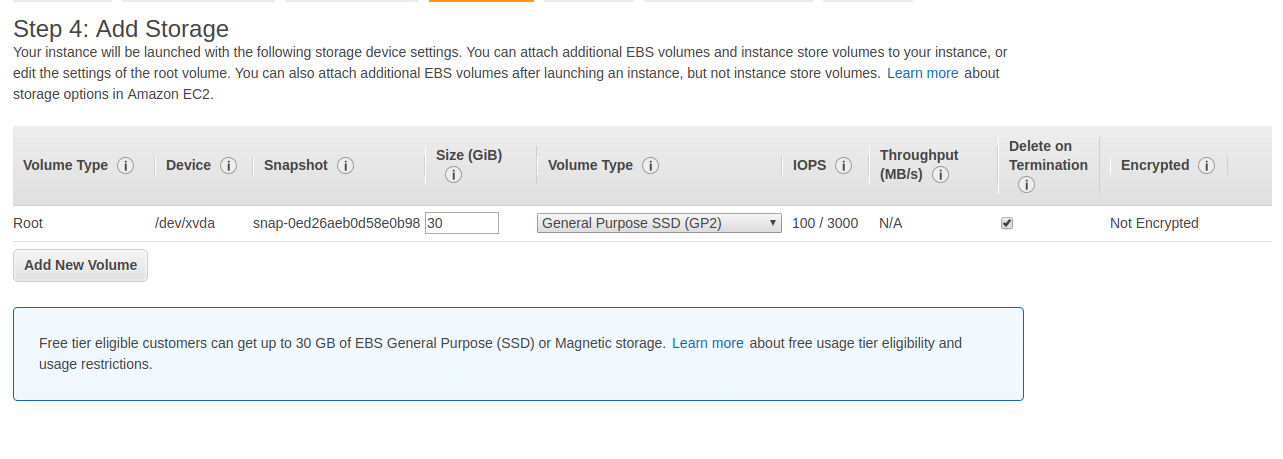
Fig 4. Add storage
Finally, click on Review and Launch. You can edit your security group. Here you can configure to block/unblock Inbound and Outbound connections to EC2.
Click on Edit Security Group to add more ports like Apache and FTP, By default, it has only SSH port 22. Here we have enabled all inbound traffic to my EC2 & enabled IPV4, IPV6 ICMP. If you fail to enable the ICMP you cannot test the IP addresses using ping.
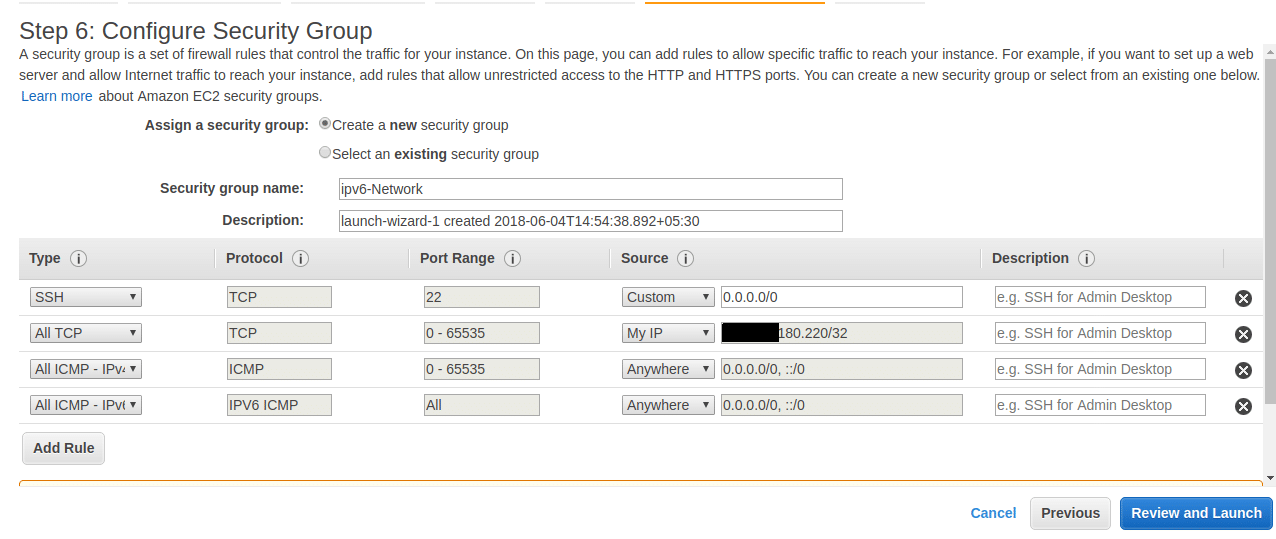
Fig 5. Choose security group
Click on Review and Launch.
When you click on Launch, you have to create a key pair to access your EC2. Type your key pair name, download it and keep it in a safe location.
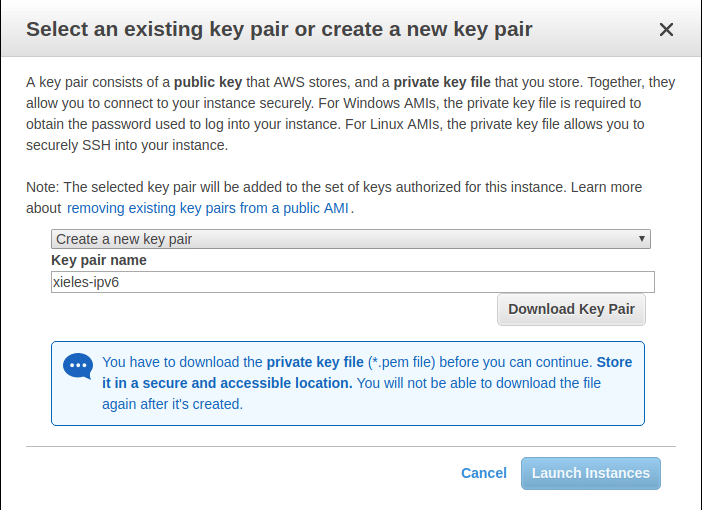
Fig 6. Select key pair
Go to EC2 Dashboard. You could see that your new instance is created
Attach IPv4 Elastic IP to EC2:
Step 1. Click on Elastic IP’s (Under Network and Security)
Step 2. Allocate new address
Step 3. You will get a new IPv4 addresses
Step 4. Go to elastic IP’s >> Select the IPv4 address >> Actions >> Associate addresses
Step 5. In the associate address fields, you have to put your instance ID and private IP
You can see your instance ID from EC2 Dashboard, it’s looking like 02de68049e850de34
Step6. Click on Associate >> now you will get a permanent IPv4 address for your EC2.
$ ping 18.220.166.201
PING 18.220.166.201 (18.220.166.201) 56(84) bytes of data.
64 bytes from 18.220.166.201: icmp_seq=1 ttl=235 time=270 ms
64 bytes from 18.220.166.201: icmp_seq=2 ttl=235 time=271 ms
64 bytes from 18.220.166.201: icmp_seq=3 ttl=235 time=271 ms
So now IPv4 is okay.
Now you can login to the ec2 instance using keypair & IPv4 addresses
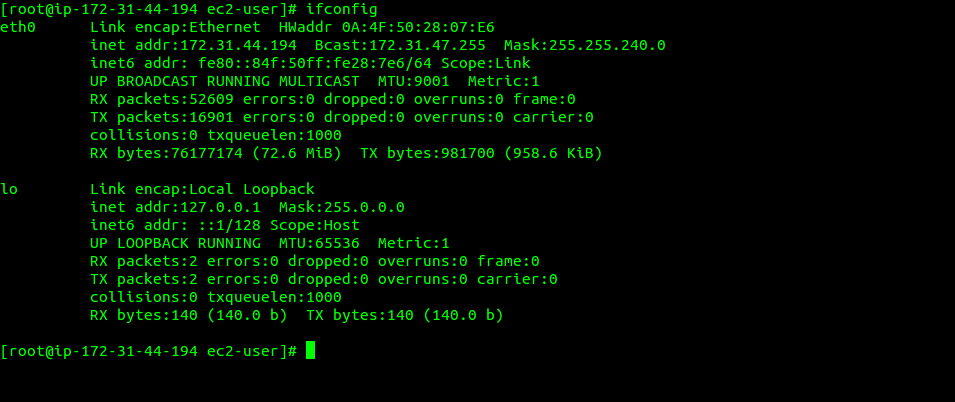
Fig 7. ifconfig result
Attach IPv6 on EC2
On the AWS dashboard, you can see no IPv6 addresses attached for your EC2.
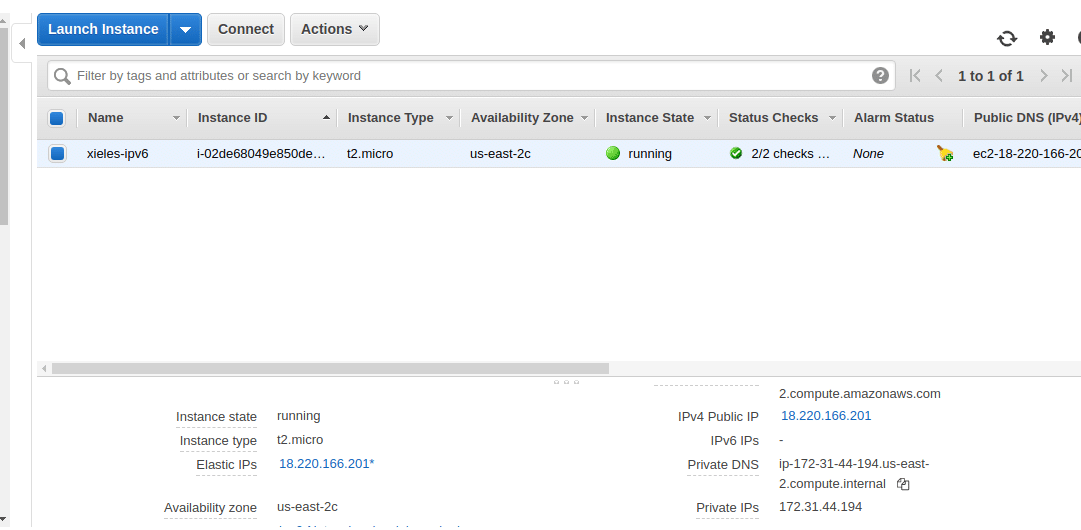
Fig 8. Instance List
Step 1. Go to AWS main dashboard. Select VPC
Amazon Virtual Private Cloud (Amazon VPC) enables you to launch AWS resources into a virtual network that you’ve defined. This virtual network closely resembles a traditional network that you’d operate in your own data center, with the benefits of using the scalable infrastructure of AWS.
For more information about VPC refer
https://docs.aws.amazon.com/AmazonVPC/latest/UserGuide/VPC_Introduction.html
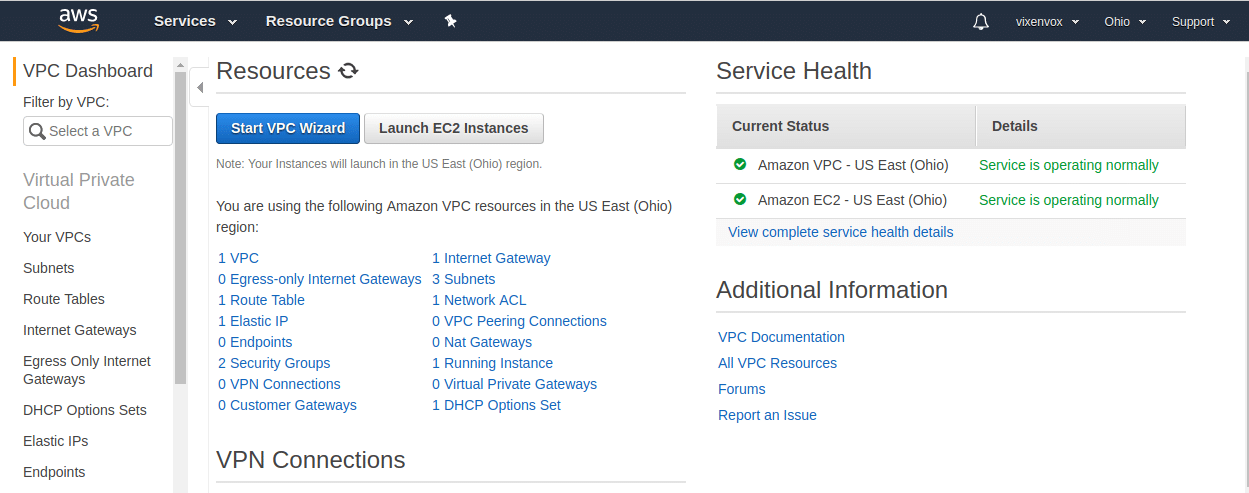
Fig 9. VPC
You could see one VPC is running, so select that VPC. It’s a default VPC that attached to our EC2.
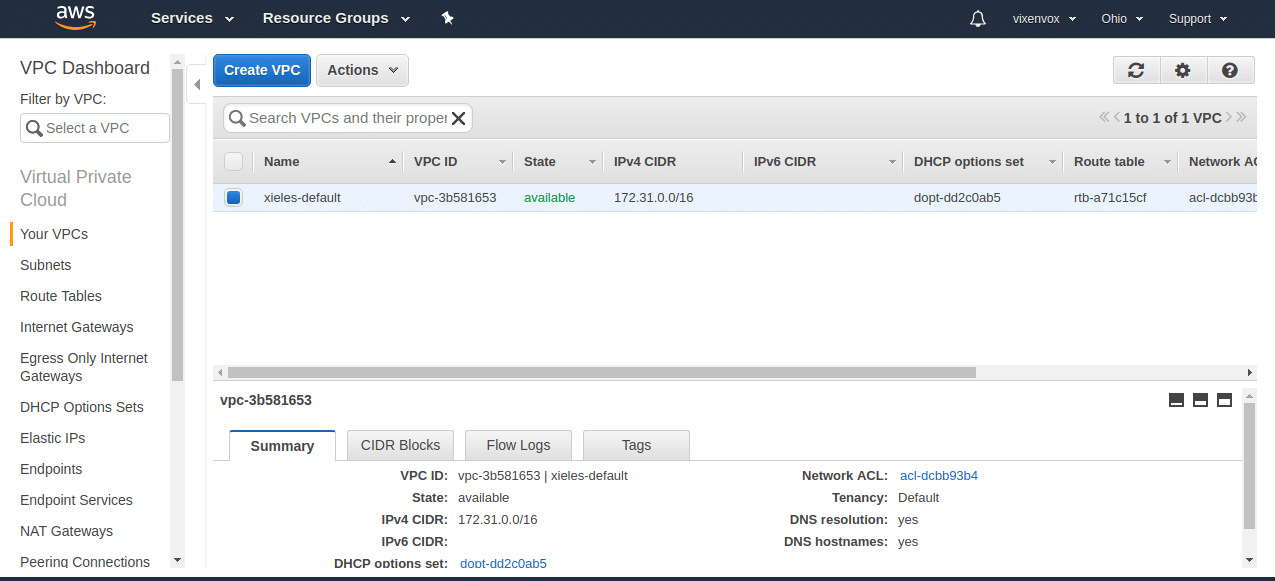
Fig 10. VPC
Step 2. Select your VPC >> Actions >> Edit CIDR’s
Step 3. In this window click on Add IPv6 CIDR’s
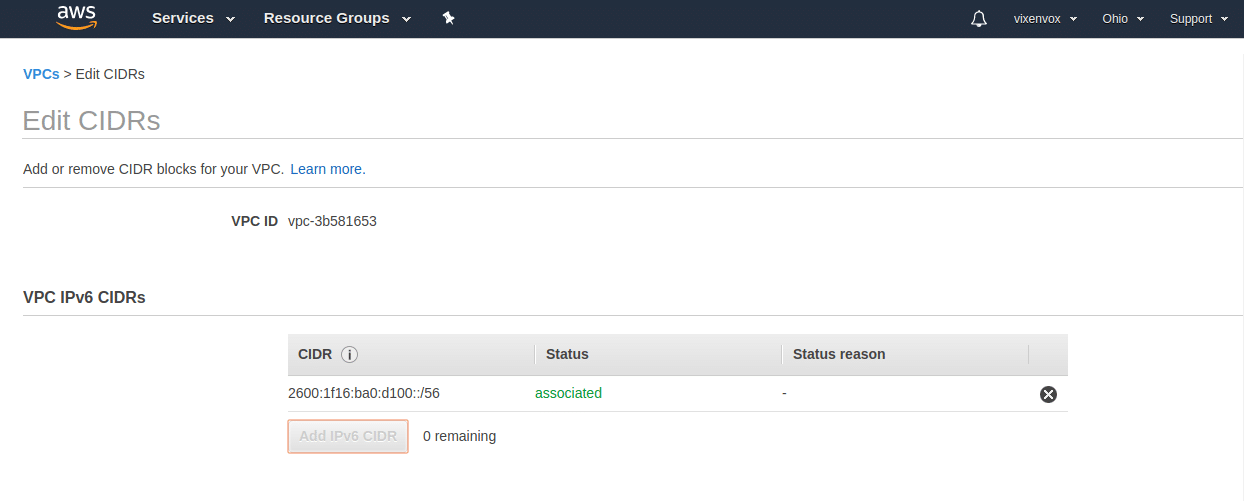
Fig 11. Edit CIDR
So new IPv6 CIDR’s is associated. Now go back to VPC dashboard.
Step 4. The next part is to edit the subnets.
Go to Subnets, to list all subnets. Enable IPv6 CIDR’s for all subnets
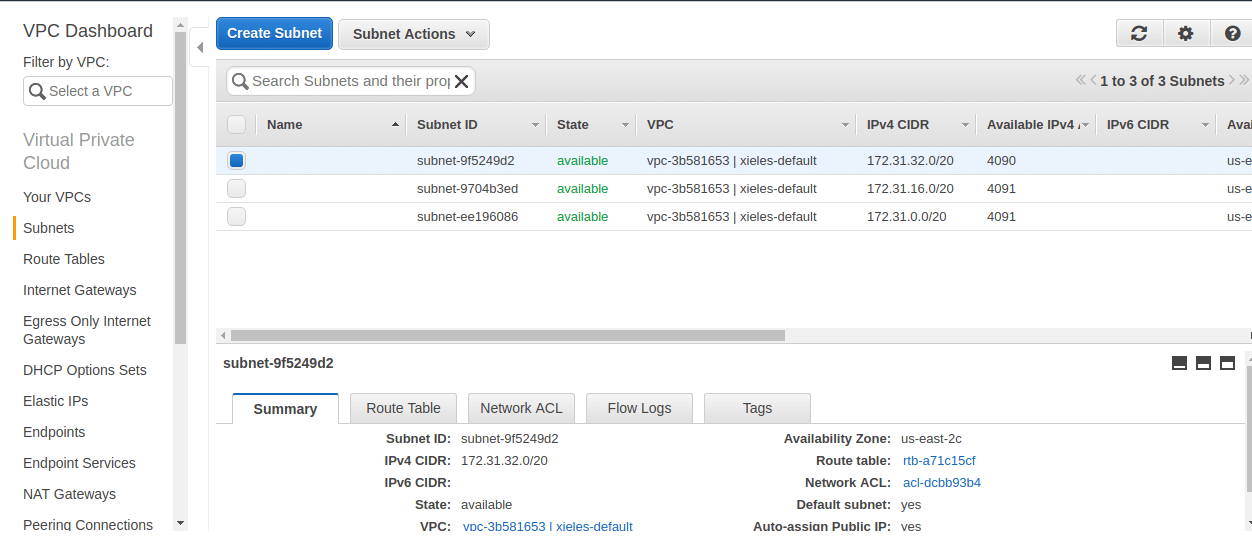
Fig 12. Subnets
Select the subnets >> Subnet actions >> Edit IPv6 CIDR’s >> Add IPV6 CIDR’s
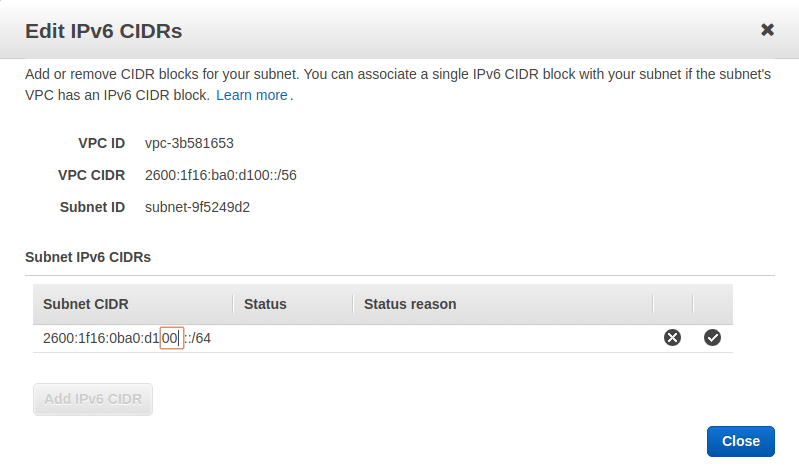
Fig 13. Edit IPv6 CIDR
You can edit the subnet in the 00 field like 00, 01, 02 likewise
So the same for all subnets, I have done for all my three subnets.
Step 5. Edit the Route tables.
Route Tables
A route table contains a set of rules, called routes, that are used to determine where network traffic is directed.
Each subnet in your VPC must be associated with a route table; the table controls the routing for the subnet. A subnet can only be associated with one route table at a time, but you can associate multiple subnets with the same route table.
For more information about AWS Route table refer https://docs.aws.amazon.com/AmazonVPC/latest/UserGuide/VPC_Route_Tables.html
In this Route table, you have to edit it to accept IPv6 connection
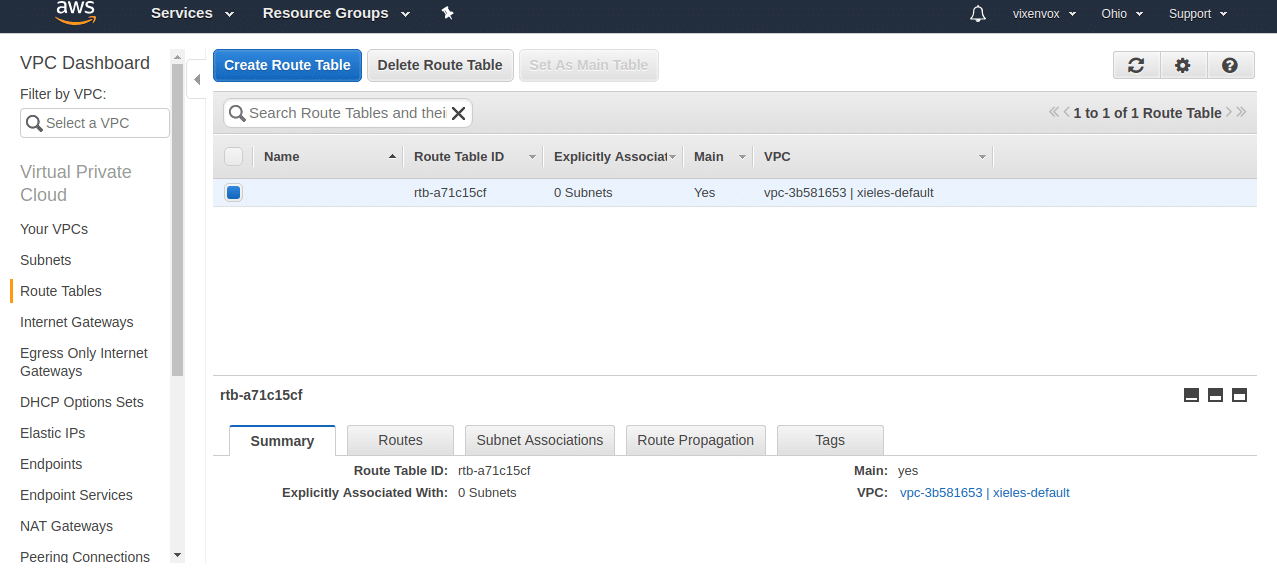
Fig 14. Route table
Goto Routes >> Edit >> Add another rule >> add ::/0 then target igw-73f83f1b, just same as IPv4

Fig 15: Route tables
Click Save.

Fig 16: Route table
Step 6. Now we can assign an IPv6 address for our EC2.
Go to EC2 Dashboard >> Select your EC2 instance
Click on Actions >> Networking >> Manage IP addresses
You will see a window to assign IPv6 addresses

Fig 17: Manage IP addresses
Click on Assign new IP on the IPv6 addresses >> Yes Update
we got a new IPv6 address
2600:1f16:ba0:d101:4fec:5f48:5cac:17ad

Fig 18: Manage IP addresses
Go to your instance and check EC2
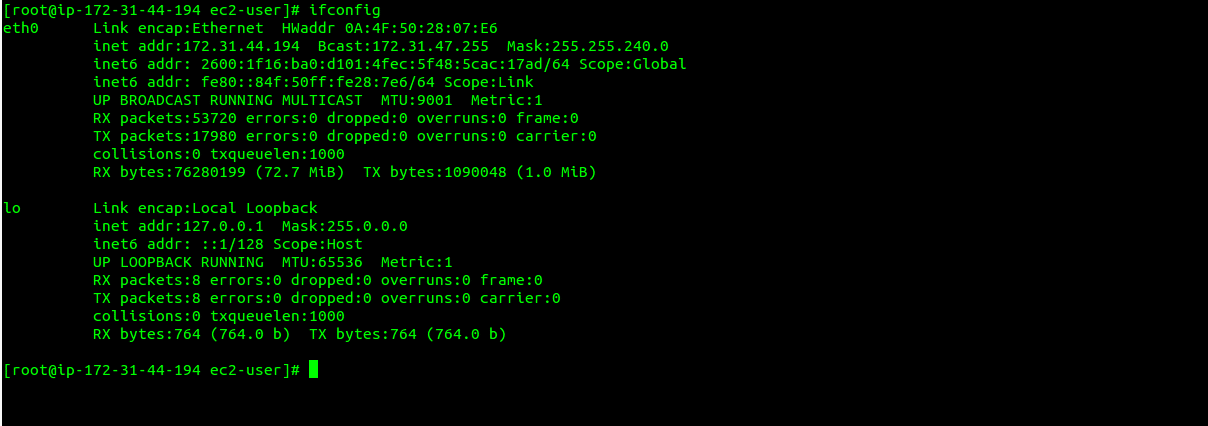
Fig 19: ifconfig result
[root@ip-172-31-44-194 ec2-user]# ping6 2600:1f16:ba0:d101:4fec:5f48:5cac:17ad
PING 2600:1f16:ba0:d101:4fec:5f48:5cac:17ad(2600:1f16:ba0:d101:4fec:5f48:5cac:17ad) 56 data bytes
64 bytes from 2600:1f16:ba0:d101:4fec:5f48:5cac:17ad: icmp_seq=1 ttl=64 time=0.041 ms
64 bytes from 2600:1f16:ba0:d101:4fec:5f48:5cac:17ad: icmp_seq=2 ttl=64 time=0.043 ms
64 bytes from 2600:1f16:ba0:d101:4fec:5f48:5cac:17ad: icmp_seq=3 ttl=64 time=0.043 ms[root@ip-172-31-44-194 ec2-user]# ping6 www.google.com
PING www.google.com(ord38s09-in-x04.1e100.net) 56 data bytes
64 bytes from ord38s09-in-x04.1e100.net: icmp_seq=1 ttl=44 time=18.9 ms
64 bytes from ord38s09-in-x04.1e100.net: icmp_seq=2 ttl=44 time=18.9 ms
64 bytes from ord38s09-in-x04.1e100.net: icmp_seq=3 ttl=44 time=18.9 ms
You can also test the IPv6 from outside if you have IPv6 network or IPv6 enabled servers.
Another option test IPv6 by an online tool
http://www.ipv6now.com.au/pingme.php
That’s all. If you want to setup Network ACL’s and Egress only Internet gateway or any other aws related project, feel free to contact xieles support 24/7. Our cloud experts will help you to solve all your all aws related issues.
Xieles Support can help you to setup Network ACL’s and Egress only Internet gateway or any other aws related project. Get a quote from us if you need any assistance.
STILL SPENDING TIME ON SUPPORT?
Outsource your helpdesk support to save time and money. We have technicians available for little over 5 USD per hour in order to assist your customers with their technical questions. Grow your business and concentrate more on your SALES!
Xieles Support is a provider of reliable and affordable internet services, consisting of Outsourced 24×7 Technical Support, Remote Server Administration, Server Security, Linux Server Management, Windows Server Management and Helpdesk Management to Web Hosting companies, Data centers and ISPs around the world. We are experts in Linux and Windows Server Administration, Advanced Server Security, Server Security Hardening. Our primary focus is on absolute client satisfaction through sustainable pricing, proactively managed services, investment in hosting infrastructure and renowned customer support.


