Server virtualisation has become a norm in many organisations whether small or big enterprise. Virtual machines running in today’s infrastructure are revenue generating, tier 1 where most critical applications cannot afford to go down or degraded. In this article, we will discuss how to install SolarWinds Virtualization Manager 8.2, configuration and how to perform VMware monitoring with SolarWinds.
Overview
Datacenter monitoring is an essential component of any IT Administrator but never has capacity planning, resource monitoring and troubleshooting be as important as today. We require this due to a combination of virtualised and complex applications running on-premise and distributed across the various data centre and even public clouds. When considering what monitoring tools to use for today’s virtual infrastructure, any IT Pro is looking for a tool that prevents issues from happening and should they occur, actionable intelligent and automated resolution is necessary. SolarWinds have been keen on improving the Virtualization manager in the various releases. They have a free version of Virtualization monitoring that can be used for a small environment. SolarWinds virtualisation Manager 7 was deployed as a virtual appliance, but this has changed from VMAN 8.0 and onwards. SolarWinds Virtualization Manager offers vSphere and Hyper-V performance monitoring and performance. You can reap benefits as below:
- Be proactive and reduce downtime by an average of 59% with proactive alerts and recommendations.
- Save time by fixing issues faster by an average of 65% with active performance alerts.
- Save money by reclaiming an average of 23% of your virtual resources using Virtual Machine sprawl recommendations.
- Centralized management with a single dashboard to optimise and fix vSphere and Hyper-V performance issues.
Prerequisites
- Check if your Infrastructure environment meets the system and hardware requirements for SolarWinds VMAN
- Download SolarWinds Offline installer here
- Sizing of your VMWare environment here
- Considering an upgrade check details
How to monitor VMware using SolarWinds
Installation of Virtualization Manager
Locate the downloaded file from your download location.

Fig 1. Download location
Launch SolarWinds Offline Installer by double-clicking on the setup.
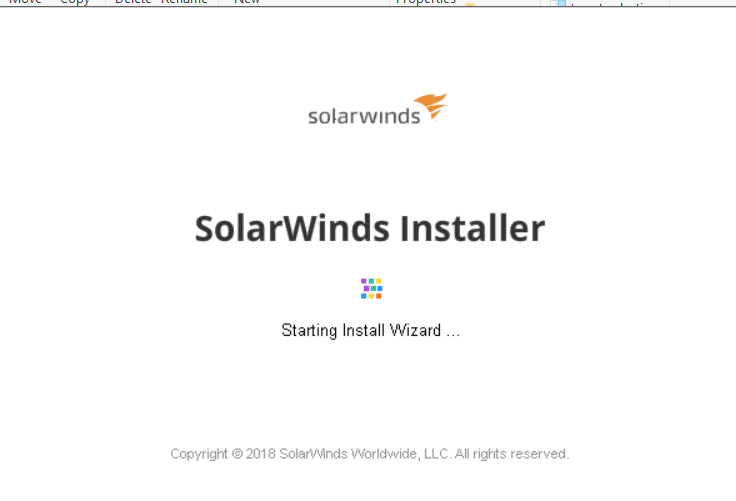
Fig 2. SolarWinds Installer
Select the type of setup; In this demonstration, we shall use Lightweight Installation.
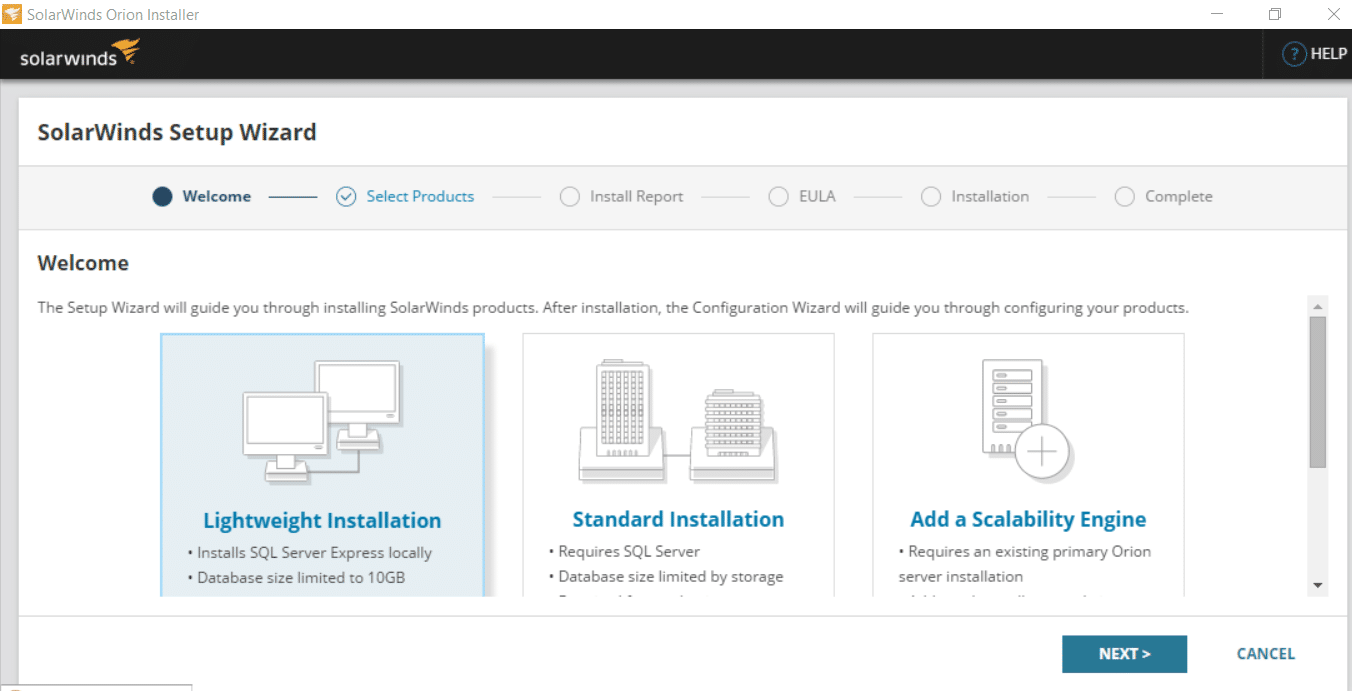
Fig 3. SolarWinds Setup Wizard
Select the product to Install which is Virtualization Manager and click Next.
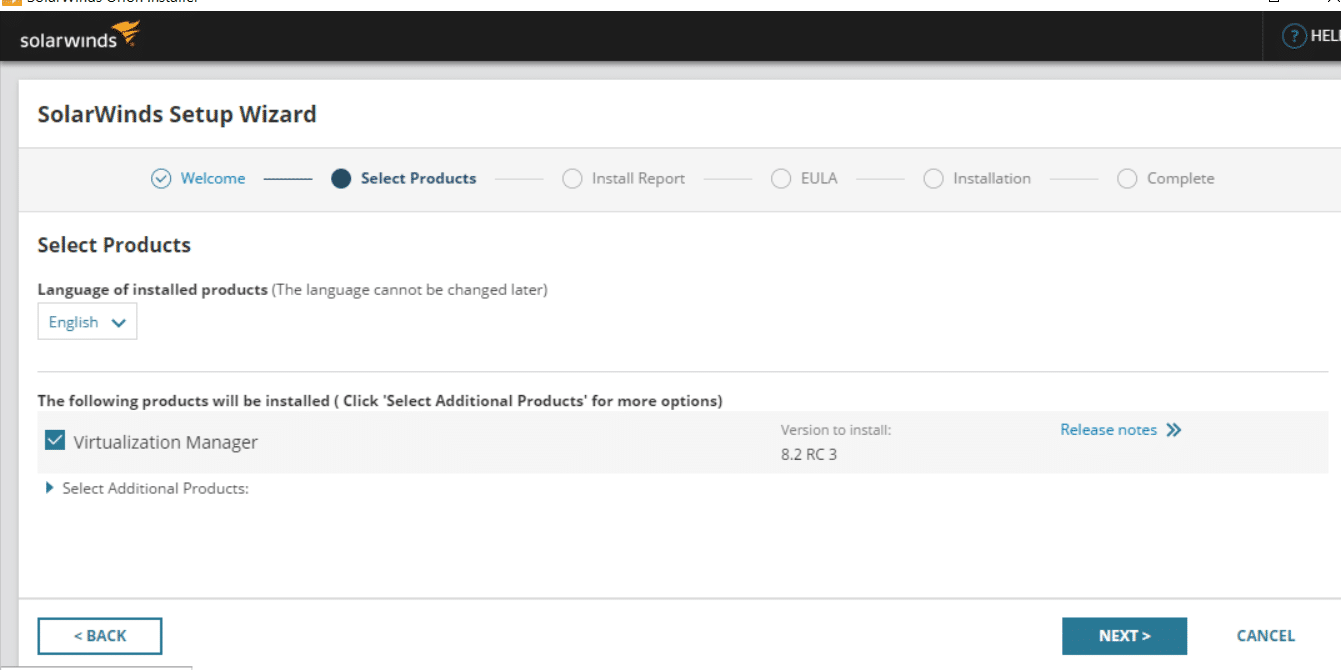
Fig 4. Product to Install
Accept End User License Agreement EULA and click Next
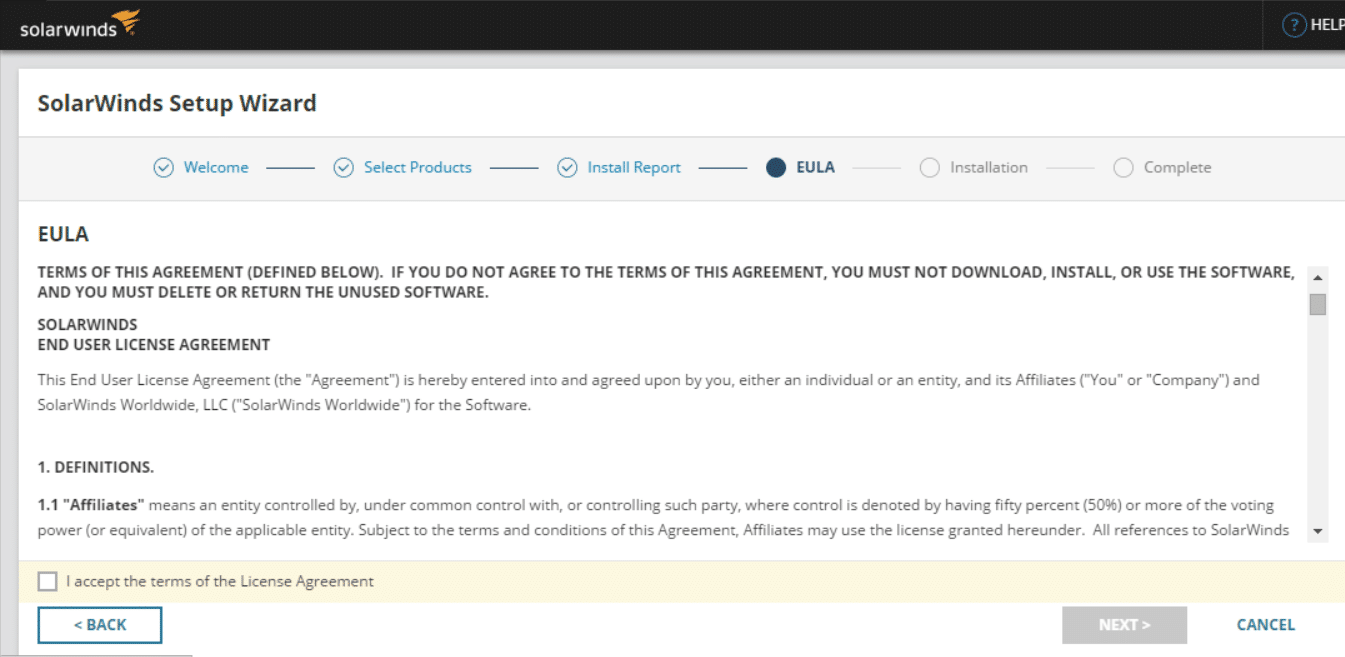
Fig 5. SolarWinds EULA
SolarWinds installation progress.
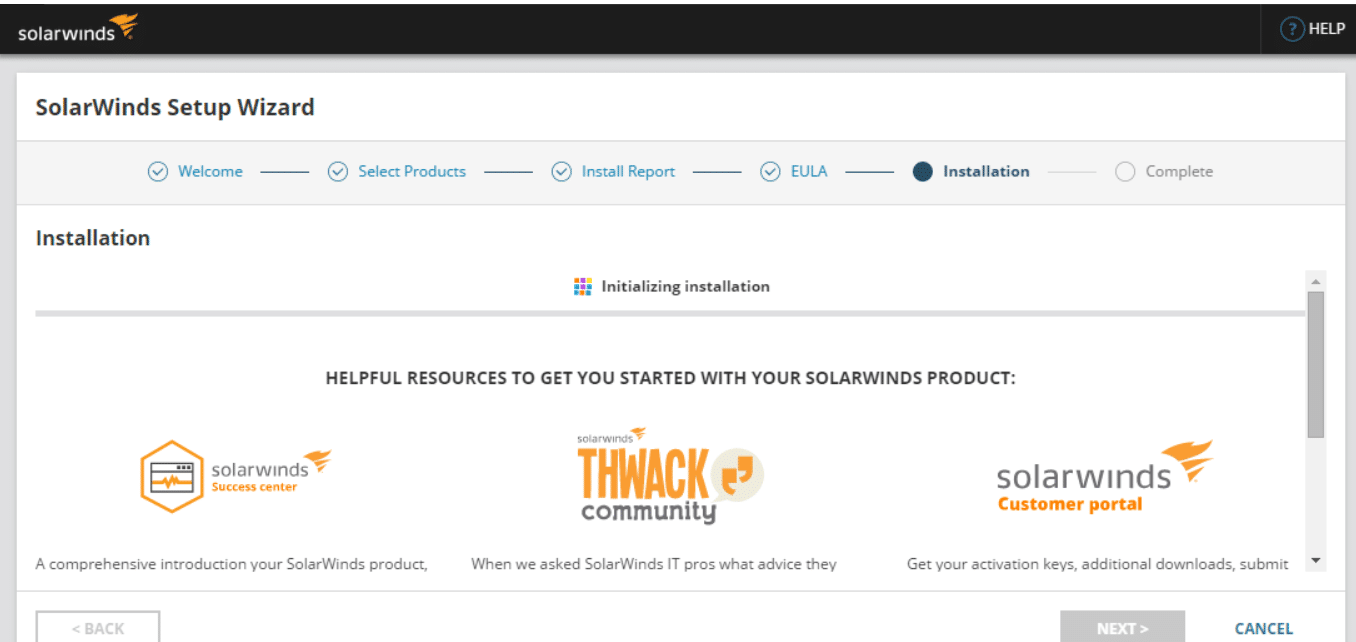
Fig 6. SolarWinds Installation progress
SolarWinds Configuration
SolarWinds installs SQL Express 2016 and SolarWinds Virtualization Manager on the computer.
In the next steps, we shall cover SQL Database configuration where SolarWinds Virtualization Manager stores the data and Website configuration as it is a web-based application.
Click Next to configure SolarWinds
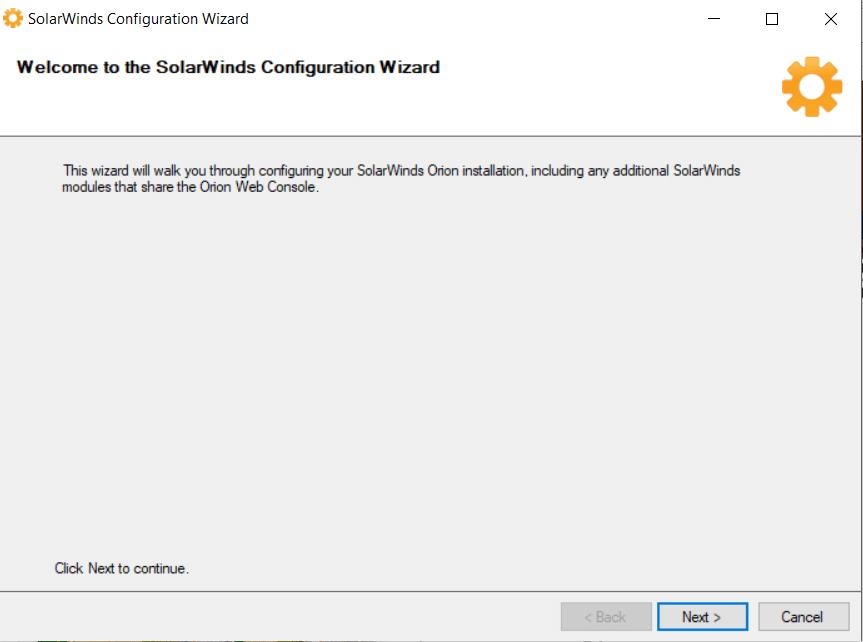
Fig 7. SolarWinds Configuration Wizard
Select the Database server (Where SolarWinds Virtualization Manager is installed). Choose Authentication method. If you have created an SQL user that has admin rights switch user to Windows or SQL Server Authentication, otherwise use the Logged in user.
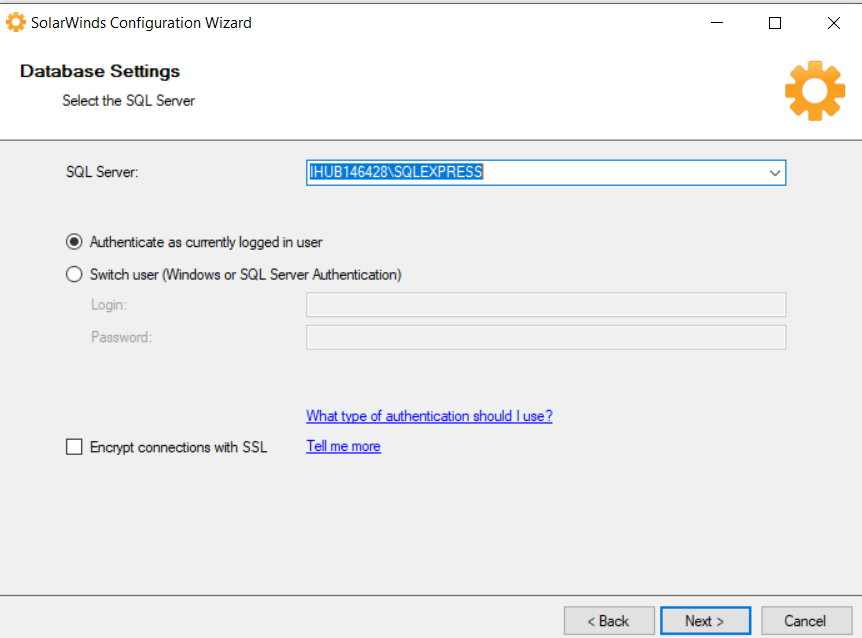
Fig 8. Database settings
Create a database named SolarWindsOrion
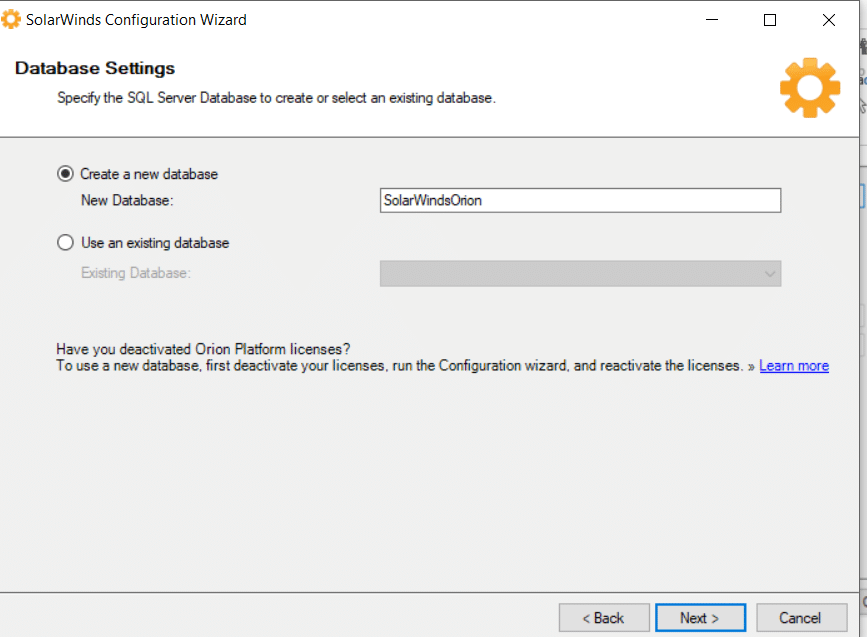
Fig 9. Create a Database
Create a SQL server user named SolarWindsOrionDatabaseUser (preferred name)
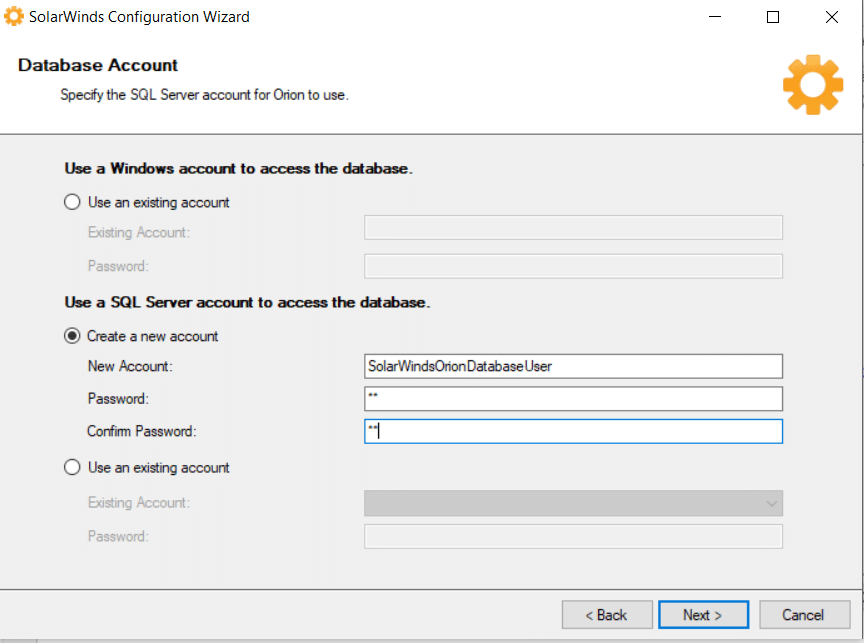
Fig 10. Create SQL Account
Configure the Website settings. If using HTTPS configure port 443, Check the option; Enable https, from the drop-down menu, select Generate Self-Signed Certificate otherwise use port 80.
Select Login method and Enable Automatic Login using Windows Authentication.
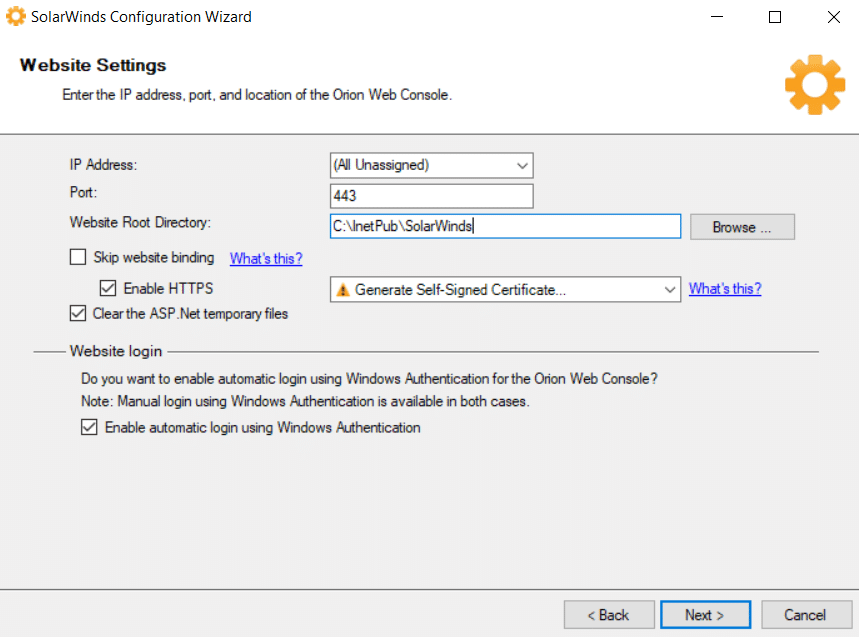
Fig 11. SolarWinds website settings
Select Services to Install. By default, all services are selected.
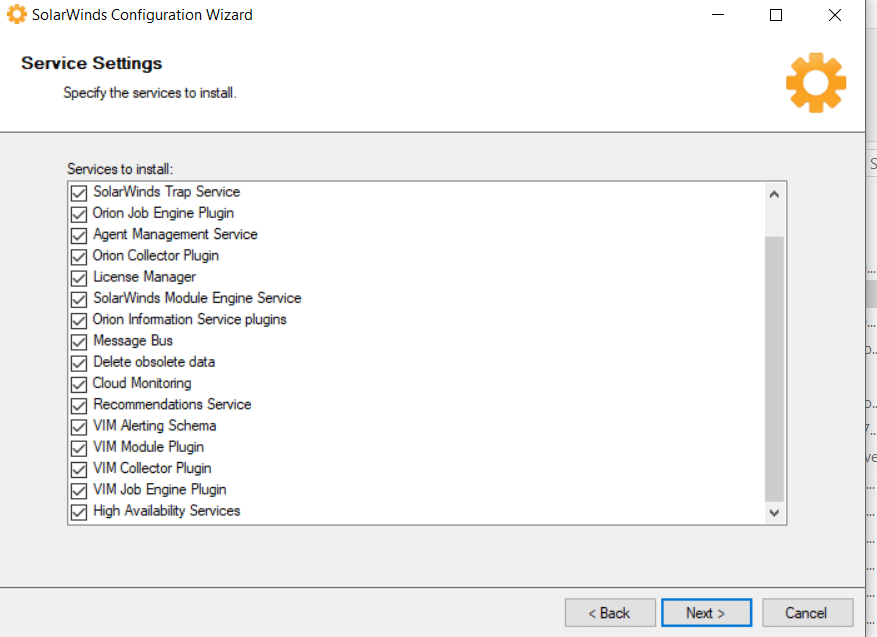
Fig 12. SolarWinds services
Summary of the configuration details
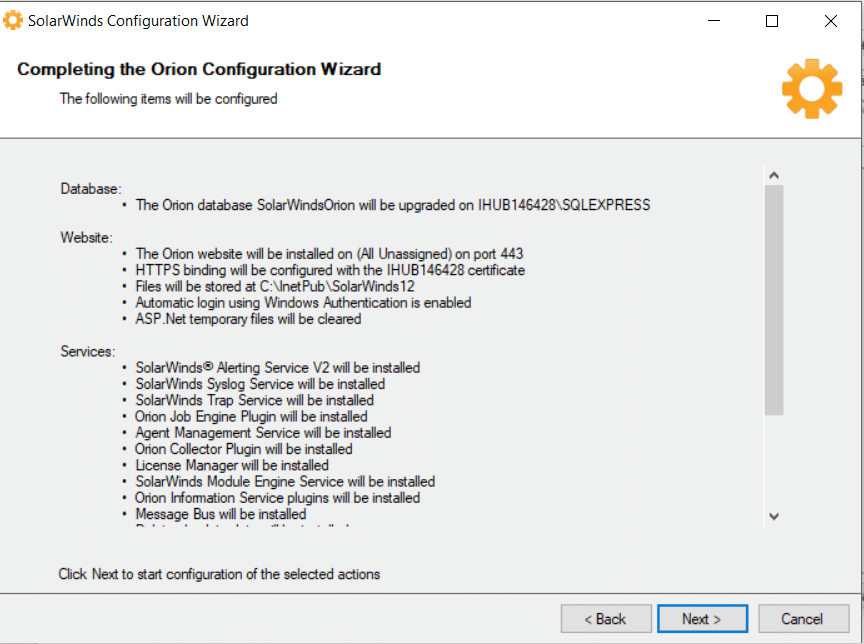
Fig 13. Summary
SolarWinds Web console should automatically launch as below. The default account is admin with a blank password.
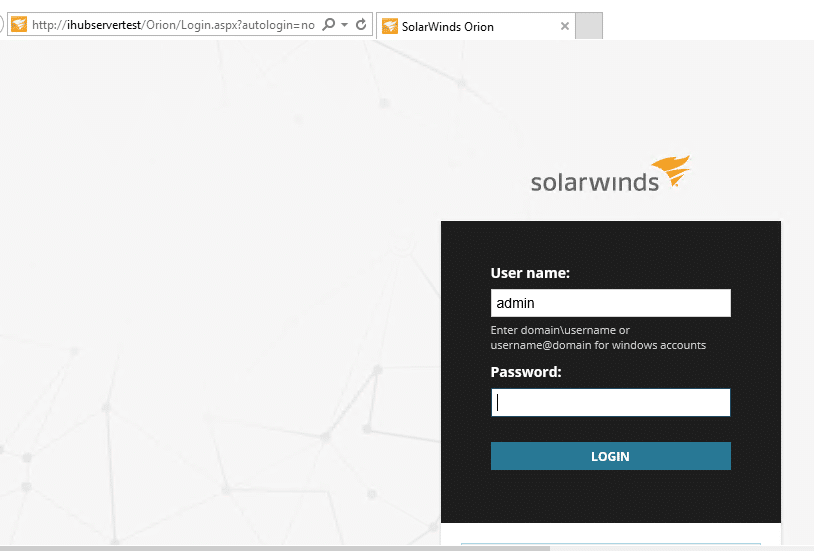
Fig 14. SolarWinds Orion Login page
Monitor VMware host
VMware infrastructure can be monitored by adding a standalone host or add vCenter server.
Fire up your browser and go to http://servername/orion/login.aspx and log in.
Navigate to Settings, Main Settings and Administration. Click on Add VMware vCenter or Hyper-V.
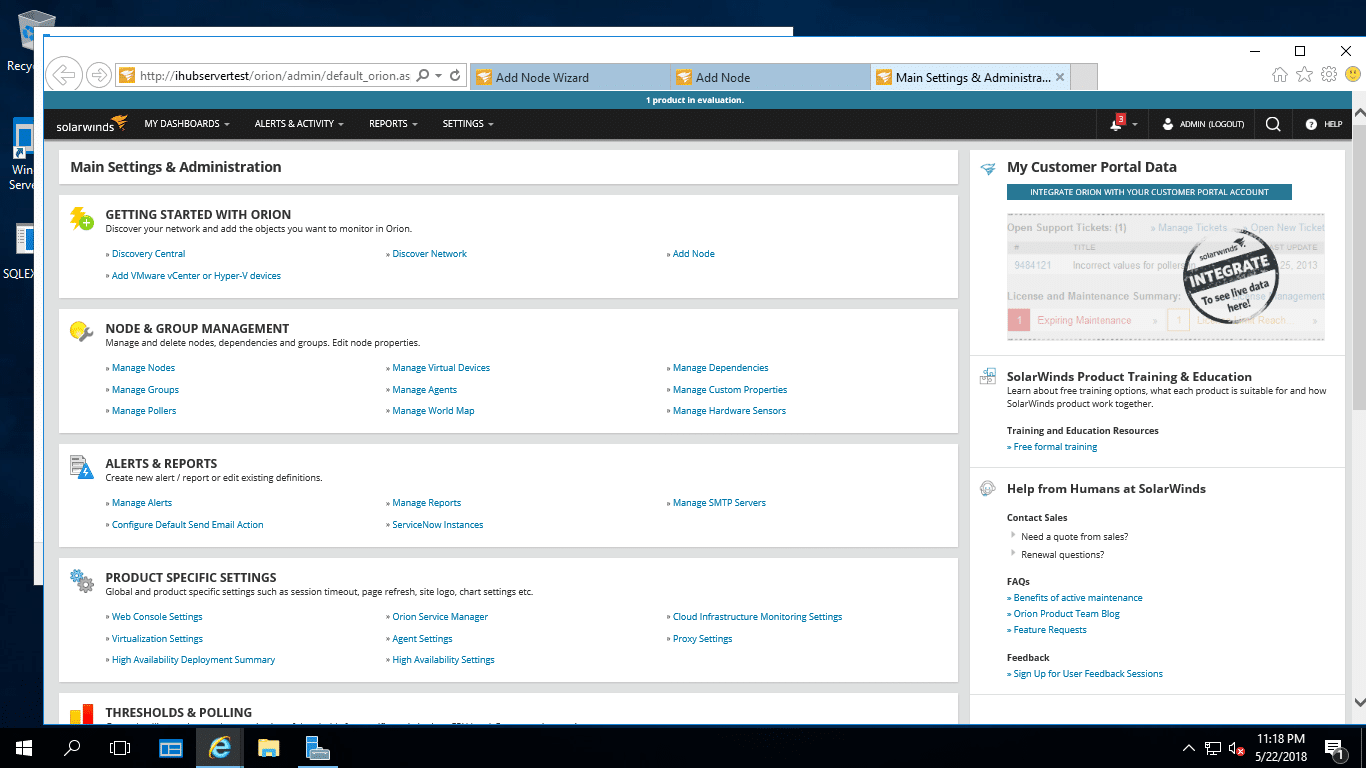
Fig 15. Mains Settings and Administration
Add A Virtual object wizard launches as below and select the virtual infrastructure in your environment. In this article, Standalone ESX is covered.
Select Standalone ESX and click Next
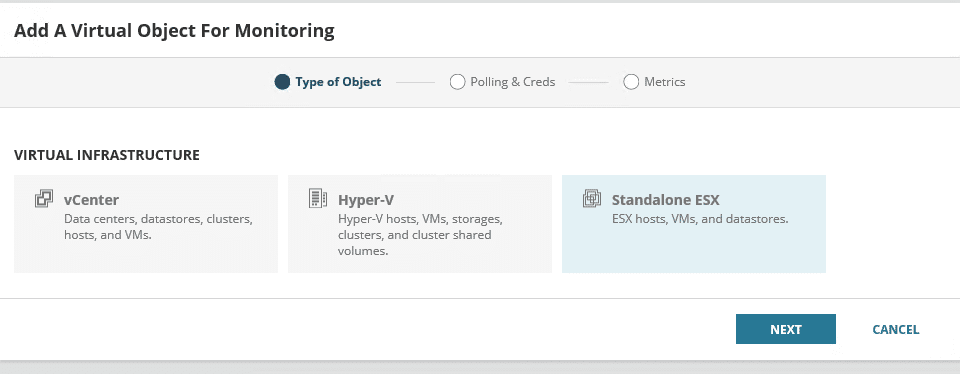
Fig 16. Add A Virtual Object
Create credentials
SolarWinds VMaN requires credentials to log in to the host to carry out inventory and send the data of the host to the SolarWinds VMAN database.
Type the IP address or VMware hostname.
Select New Credential from the drop-down menu
Type the Name of the credential: root2
Type the username: root (Host login)
Type the password: xxxxxxx
Click Next
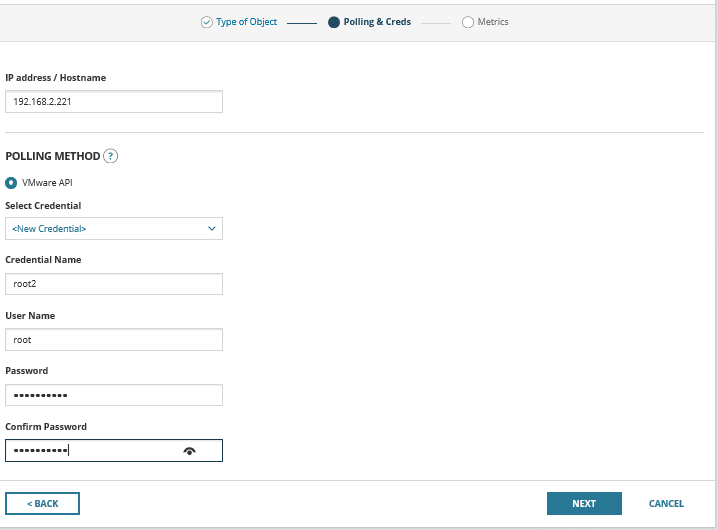
Fig 17. Create credential
Inventory about the host is added, and various information about the host is monitored from here.
Virtualization summary shows details of the host and the guest VM’s on the host as follows:
- Active alerts – any alerts that require urgent attention is displayed
- Potential issues – Refers to an issue that is likely to happen if not checked or resolved.
- Categories with issues – Issues are classified accordingly
- Recommendations – from the analysis of the issue VMAN can make a recommendation resolves any issue identified. The recommendations can be scheduled to run after hours.
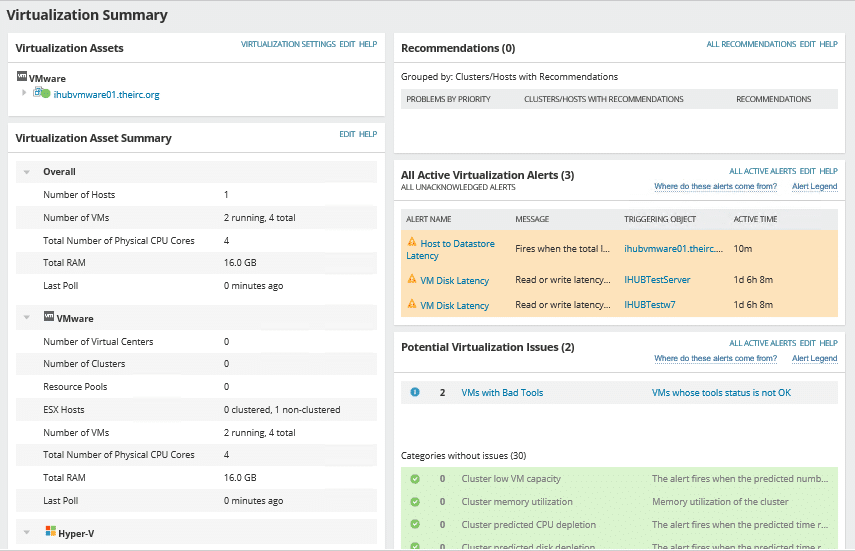
Fig 18. Virtualization Summary
- Hardware details of the hosts including the serial number are inventoried.
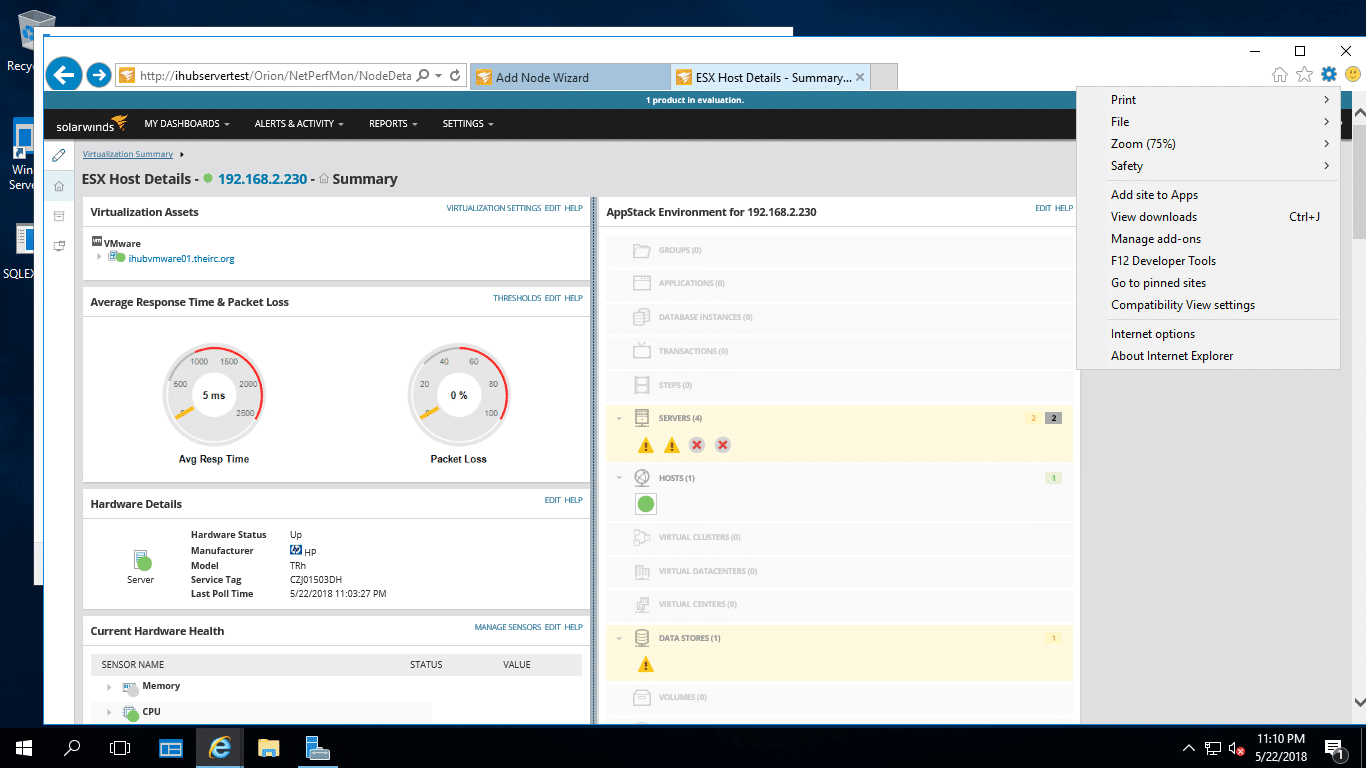
Fig 19. Host Hardware details
Hardware health regarding resource utilisation and state of the VM’s on the host.
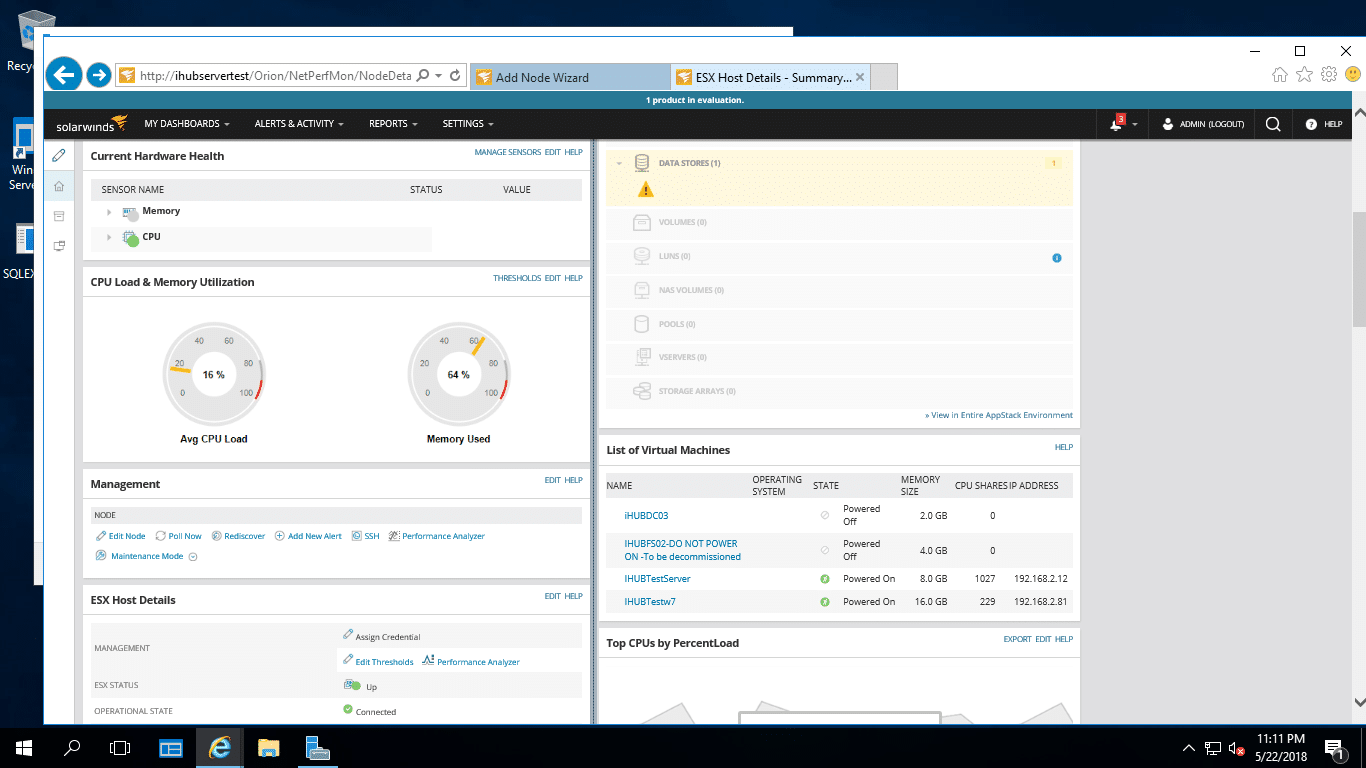
Fig 20. Hardware health
Monitor Guest OS
SolarWinds VMAM allows you to monitor the guest VM’s in multiple platforms like Windows and Linux. You can navigate to the VM from the Host details, but the guest VM cannot be managed until we add it as a node.
To manage this node with SolarWinds VMAN, click on Manage Node to open the wizard
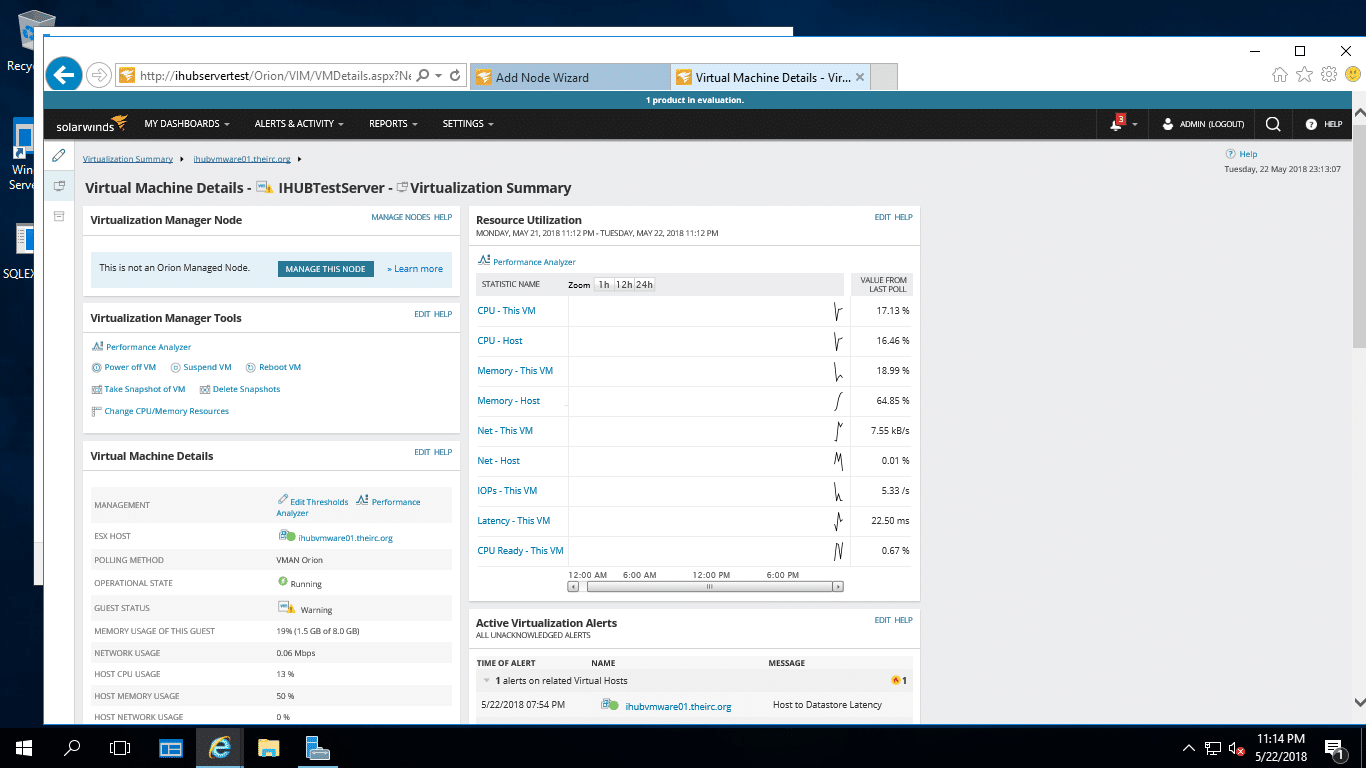
Fig 21. Guest VM details
Navigate to Settings, Main Settings and Administration. Click on Add Node to start the wizard
Type the IP address of the Guest VM
Select the poling method; Agentless or Agent-based. In this article, both were tested and found to be working.
On Choose credentials, select New credentials to create a new one if it does not exist in the drop-down menu.
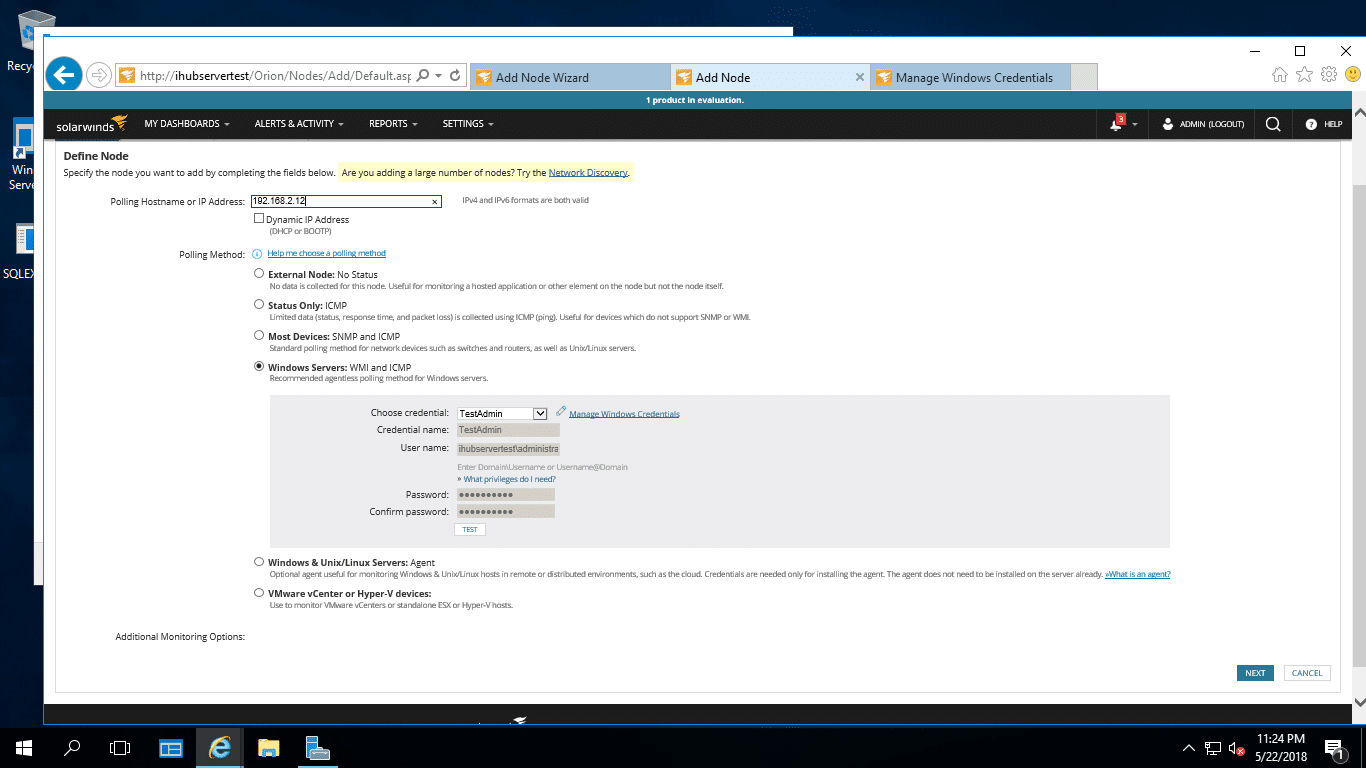
Fig 22. Polling method: Agentless
The agent will is automatically installed on the Guest VM
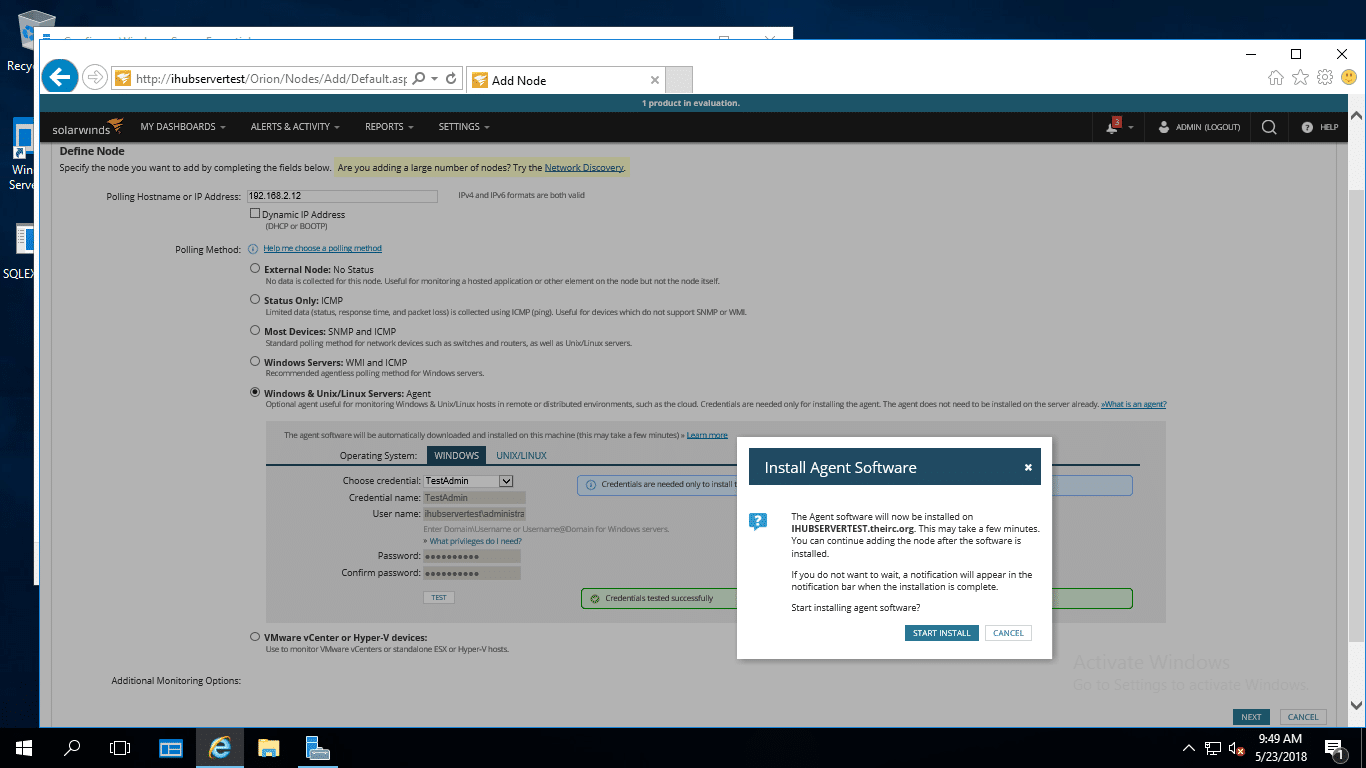
Fig 23. Polling method: Agent-based
Select the Resources to monitor in the Guest VM.
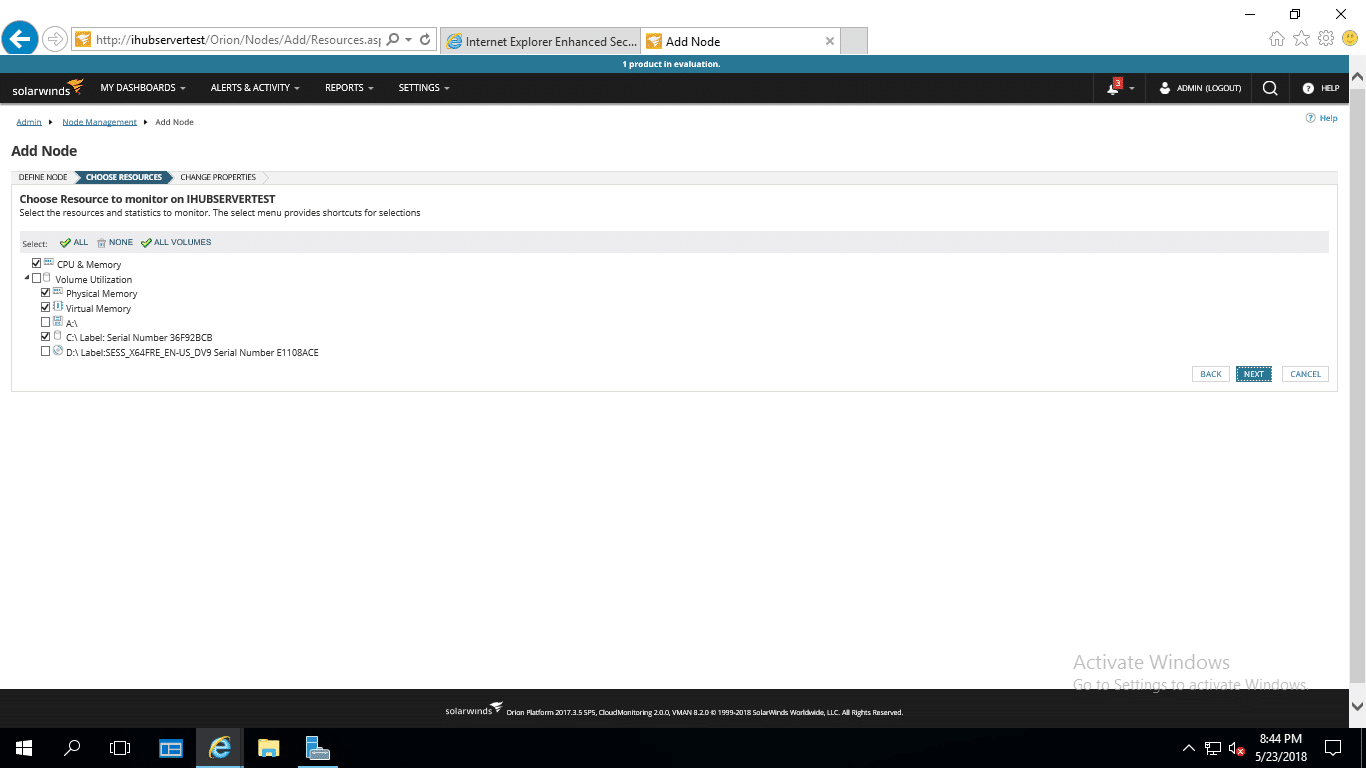
Fig 24. Guest VM resources
Edit polling settings as needed
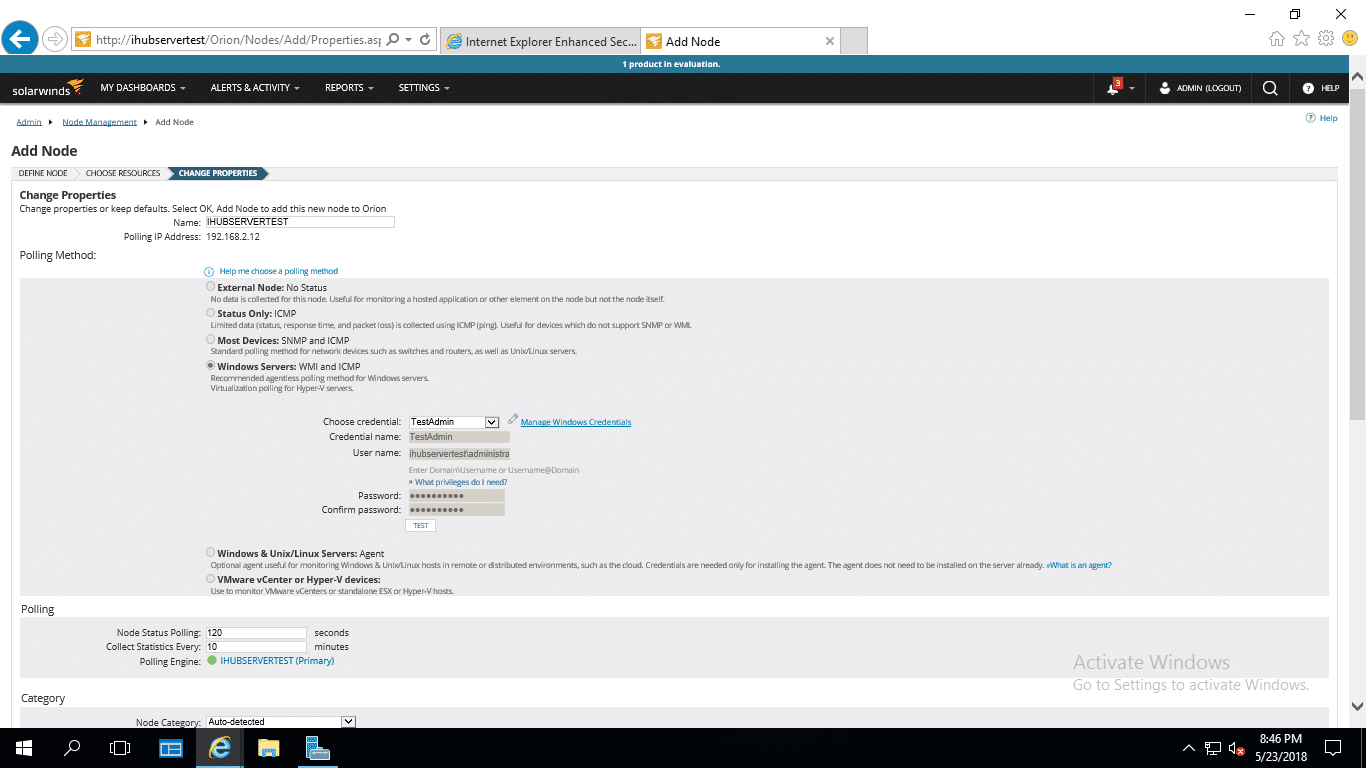
Fig 25. Guest VM Polling details
Edit is alerting settings as needed. Click Ok Add Node.
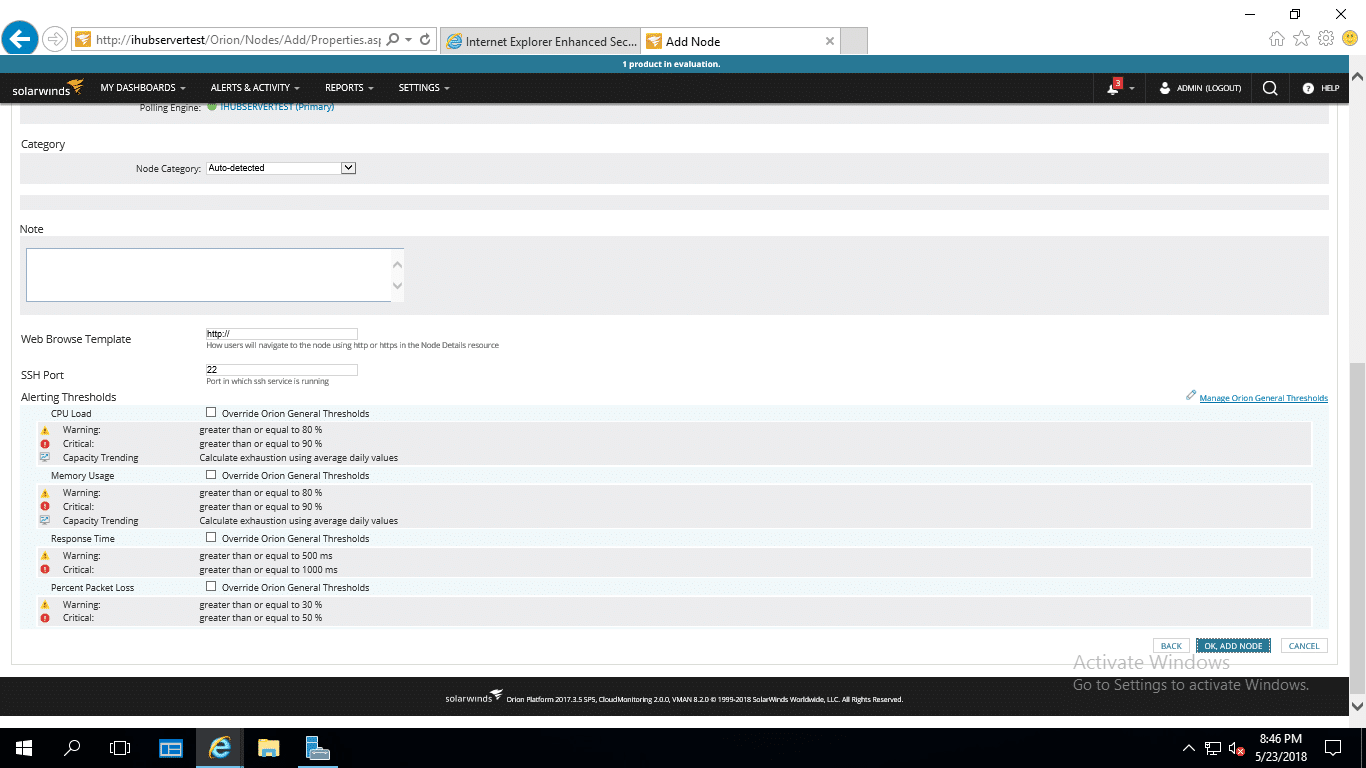
Fig 26. Guest VM: Alert settings
Node objects have successfully added.
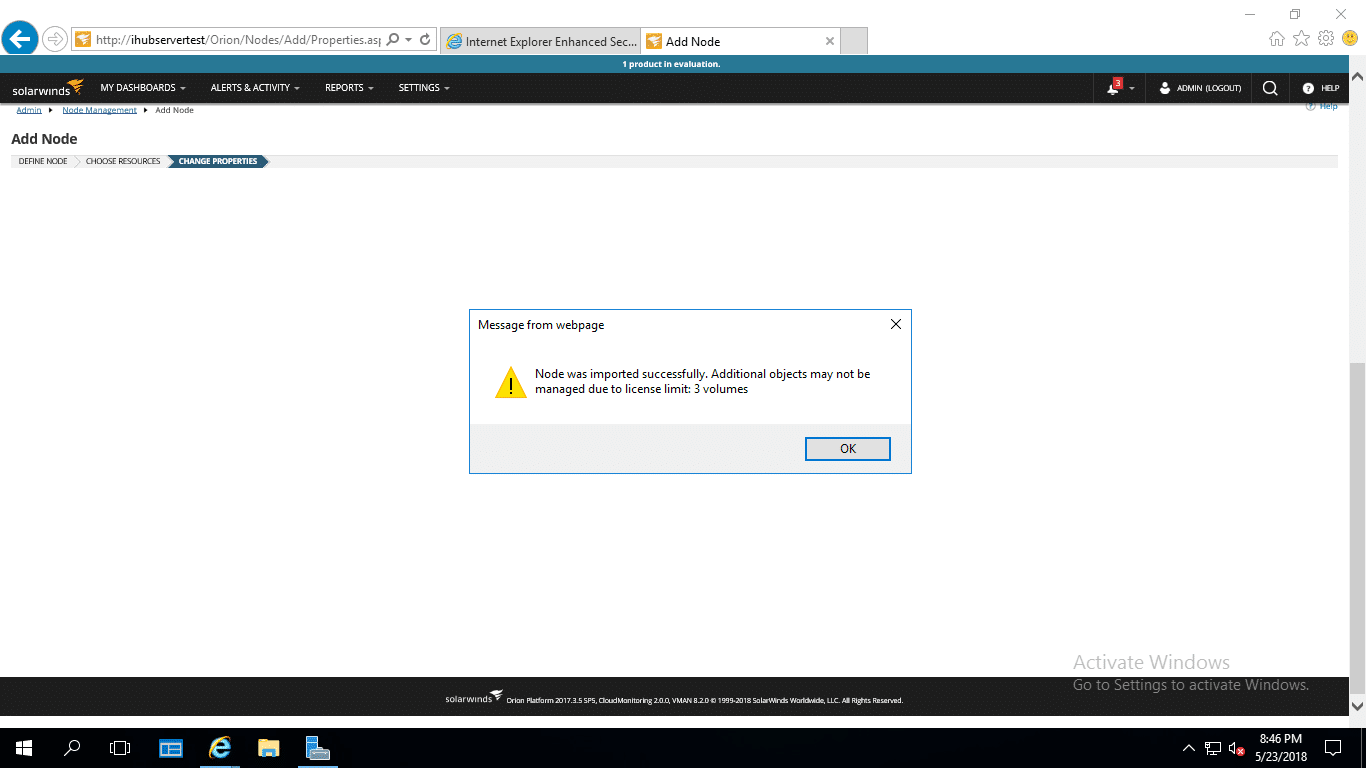
Fig 27. Node objects added
Managed Nodes are displayed below.
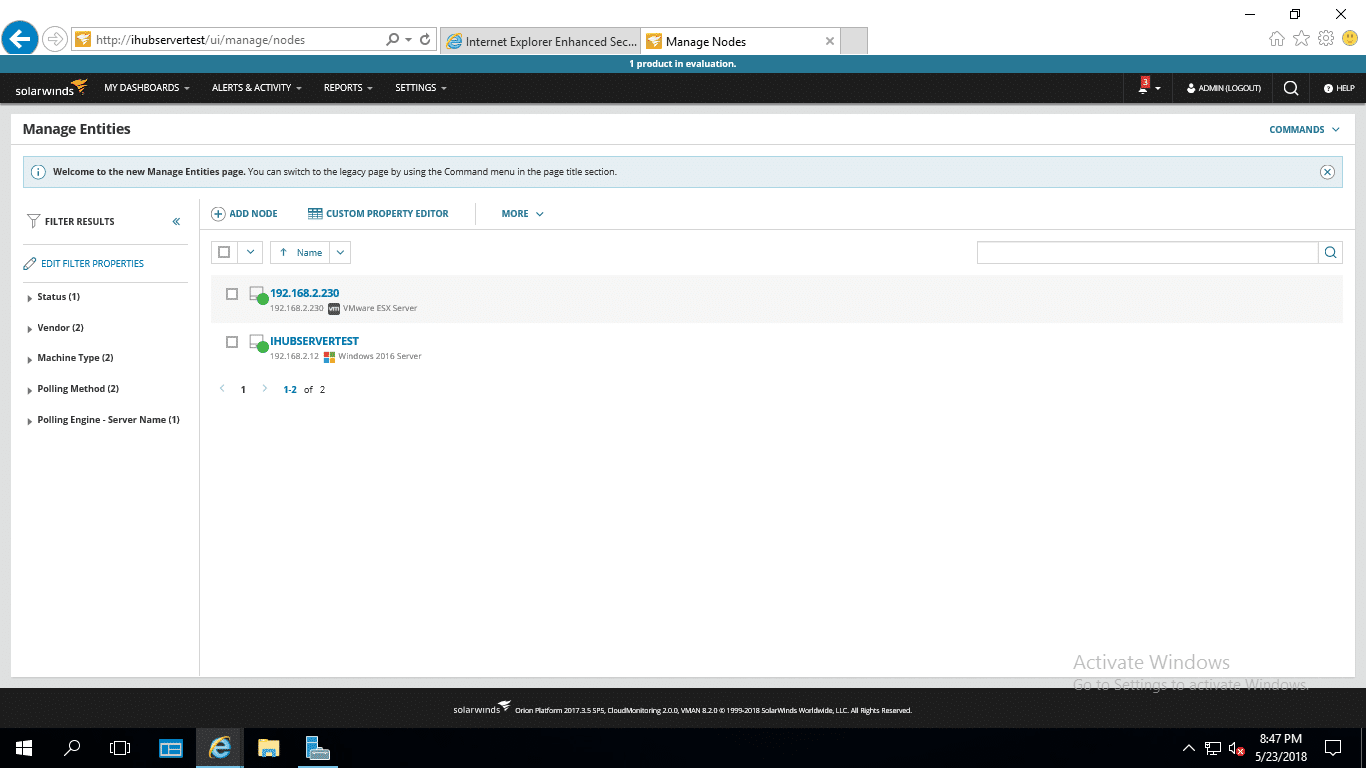
Fig 28. Managed Nodes
To view details about the Guest VM, double-click on the VM. The VM is managed from VMAN.
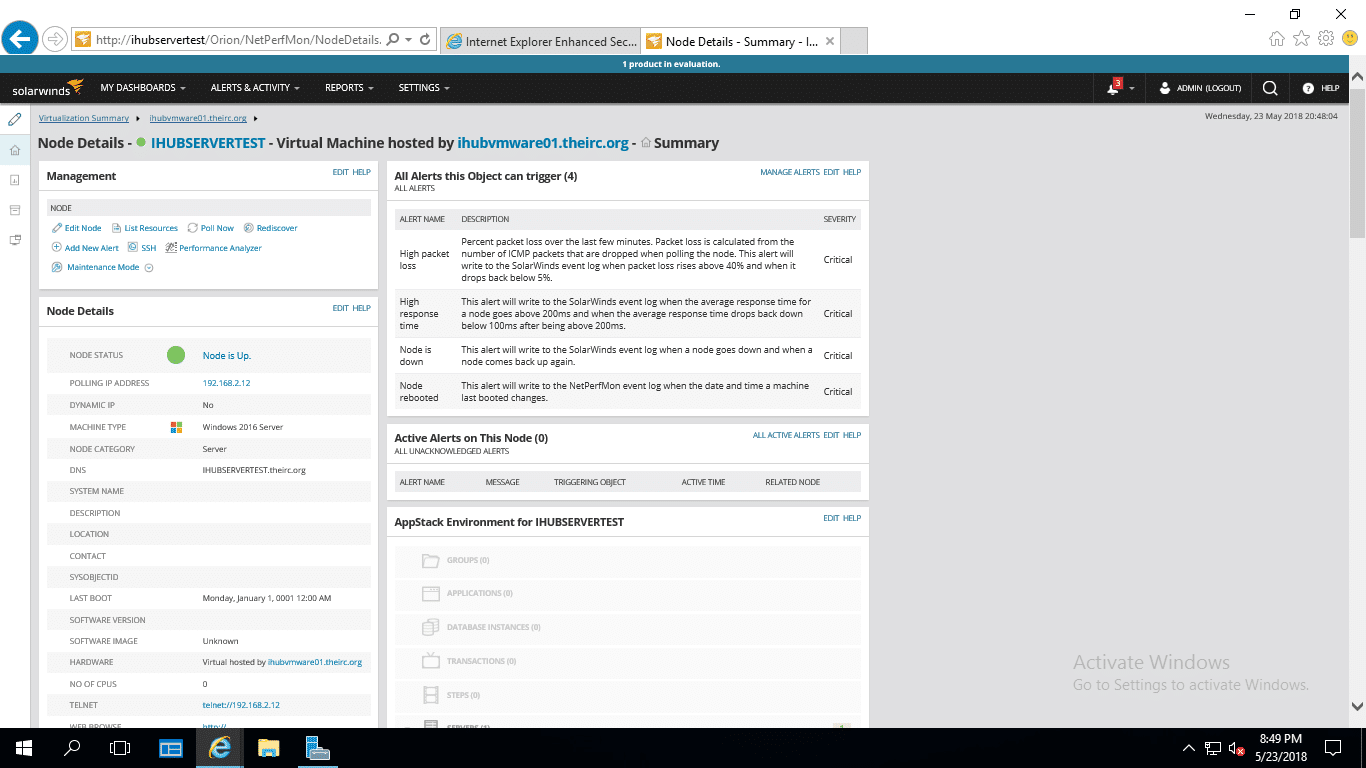
Fig 29. Guest VM Summary
Alerts
Issues detected by VMAN are displayed as alerts which can be configured to be sent to the IT administrator for further action as needed. Its good practice to acknowledge the issues and resolve them as they happen. Virtualization dashboard displays this alerts, and they can also be on All Active alerts window.
With proper configuration of thresholds and alerts notification, an IT administrator can proactively respond to issues before they happen and avert downtime.

Fig 30. Active alerts
Recommendations
VMAN Recommendation Engine ensures Virtual Machines stability and performance providence through:
- Balancing the Virtual infrastructure for optimal performance where you can spread the workload across various hosts.
- Capacity optimisation through prediction of resource utilisation and the likelihood of when they may run out to allow for proper planning.
- Prediction on future performance and capacity usage based on historical trends
VMAN fully understands your virtual environment more than you do and makes a recommendation on resource contention issues that may take you ages to notice.
In our case here, VMAN was able to identify one VM that had been overprovisioned and recommends on reducing the number of CPU’s allocated as they are not in use most of the time.

Fig 31. VMAN Recommendation
Click on the Recommendation to view the problems and steps on how to apply the recommendation. Depending on the environment and how much downtime you can take, this can be scheduled or performed on the fly.
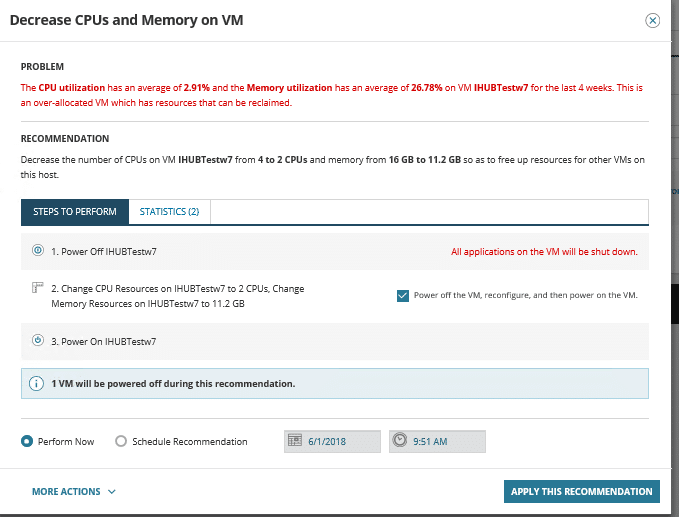
Fig 32. Recommended Action
Reporting
With a wealth of information collected by SolarWinds VMAN, various reports can be generated. Reports can also be customized to meet the Business need using the Report Writer.
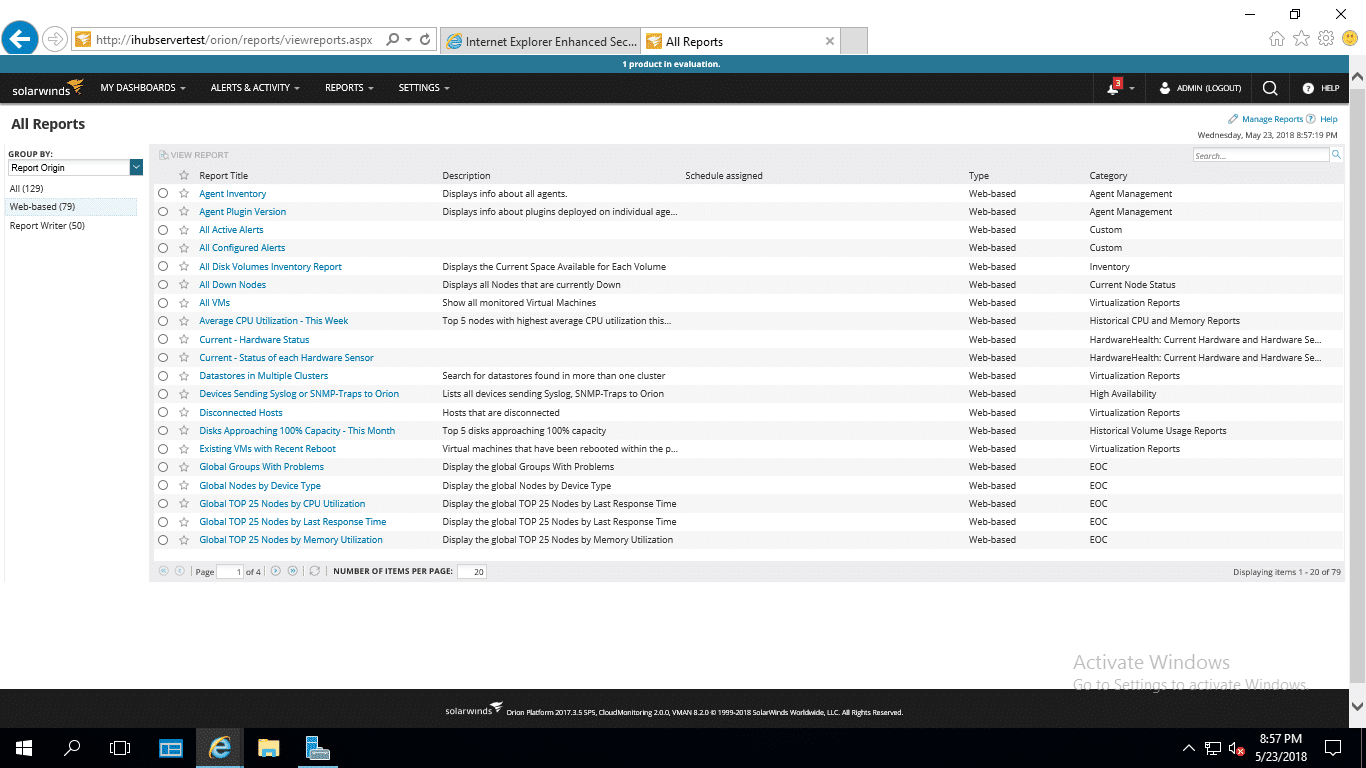
Fig 33. SolarWinds VMAN Reports
Capacity planning
The new capacity planning feature provides a wizard, which helps the user create various configurations simulating different growth scenarios. Administrators are now empowered to generate reports on the fly and provide accurate growth predictions of their virtual infrastructure to the business.
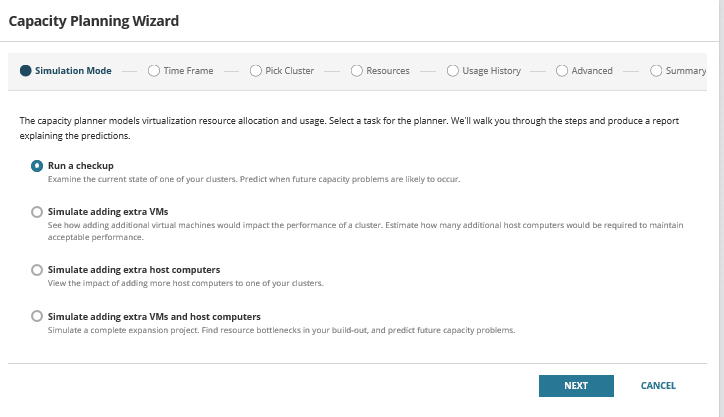
Fig 34. Capacity Planning Wizard
Conclusion
Virtualization Manager retains its strengths of being an excellent tool for performance monitoring, capacity planning, and virtual infrastructure troubleshooting and adds significant new features around recommendation, cause analysis, and even automated remediation. I like the redesigned Orion Virtualization Manager interface and the distinct wizard that adds the virtual infrastructure.
Not sure of using SolarWinds Virtualization Manager? Use the trial version to evaluate.
Xieles Support can help you with the installation of any Cloud Computing or Cloud Hosting environments and related tools. Get a quote from us if you need any assistance.
STILL SPENDING TIME ON SUPPORT?
Outsource your helpdesk support to save time and money. We have technicians available for little over 5 USD per hour in order to assist your customers with their technical questions. Grow your business and concentrate more on your SALES!
Xieles Support is a provider of reliable and affordable internet services, consisting of Outsourced 24×7 Technical Support, Remote Server Administration, Server Security, Linux Server Management, Windows Server Management and Helpdesk Management to Web Hosting companies, Data centers and ISPs around the world. We are experts in Linux and Windows Server Administration, Advanced Server Security, Server Security Hardening. Our primary focus is on absolute client satisfaction through sustainable pricing, proactively managed services, investment in hosting infrastructure and renowned customer support.


