Overview
VMware Site Recovery uses VMware Site Recovery Manager and vSphere Replication. Enabling Site recovery add-on triggers automatic installation and configuration in VMware Cloud on AWS. To allow this at a customer site:
- VMware Site Recovery Manager installed on a Microsoft Windows server
- vSphere Replication deployed as an appliance both at recovery and protection site.
- VMware vCenter Server version 6.0 U3 or 6.5 at the customer site as well.
- One or more vSphere hosts are running version 5.0 or higher at the customer site.
VMware Site Recovery, VMware vCenter Server, and workloads both at the protected and recovery sites require services like DNS, DHCP and Active Directory.
Use cases – VMware Site Recovery
VMware Site Recovery supports the following DR scenarios:
- Offers protection to on-premise datacenters against unpredicted disasters by proactively shutting down VM’s gracefully in protected sites and starting them over to DR site.
- Offers protection to VMware Cloud on AWS SDDC’s by using the on-premise infrastructure in the event of any cloud-related downtimes.
- Offers protection to VMware Cloud on AWS instances by starting them over to the configured recovery site in the cloud in case of an unpredicted failure in any of the region and Availability Zone. (AZ).
VMware Site Recovery protects up to 500 virtual machines, 250 recovery plan and up to 250 protection groups.
Prerequisites
Before you can use VMware Site Recovery, you must activate the service on VMware Cloud on AWS, prepare your on-premises environment, and connect your protected on-premises site with the recovery site on VMware Cloud on AWS.
- Set up your VMware Cloud on AWS account.
- Deploy a Software-Defined Data Center on VMware Cloud on AWS.
- Activate the VMware Site Recovery service.
In this article we shall cover the process of activating site recovery service, installing the on-premises services, configuring the firewall rules on VMware Cloud on AWS and pairing the sites. In the end, you would be ready to start replicating and protecting virtual machines.
Steps to configure VMware Site Recovery on VMware Cloud on AWS
Activate VMware Site Recovery service add-on
To activate Site recovery, log into VMware Cloud on AWS. On the created SDDC, Select Add-On
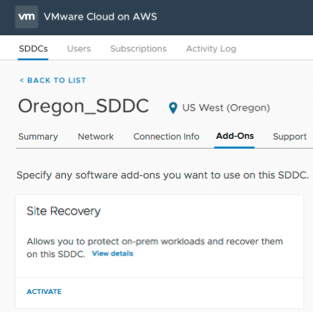
Fig 1. Addon
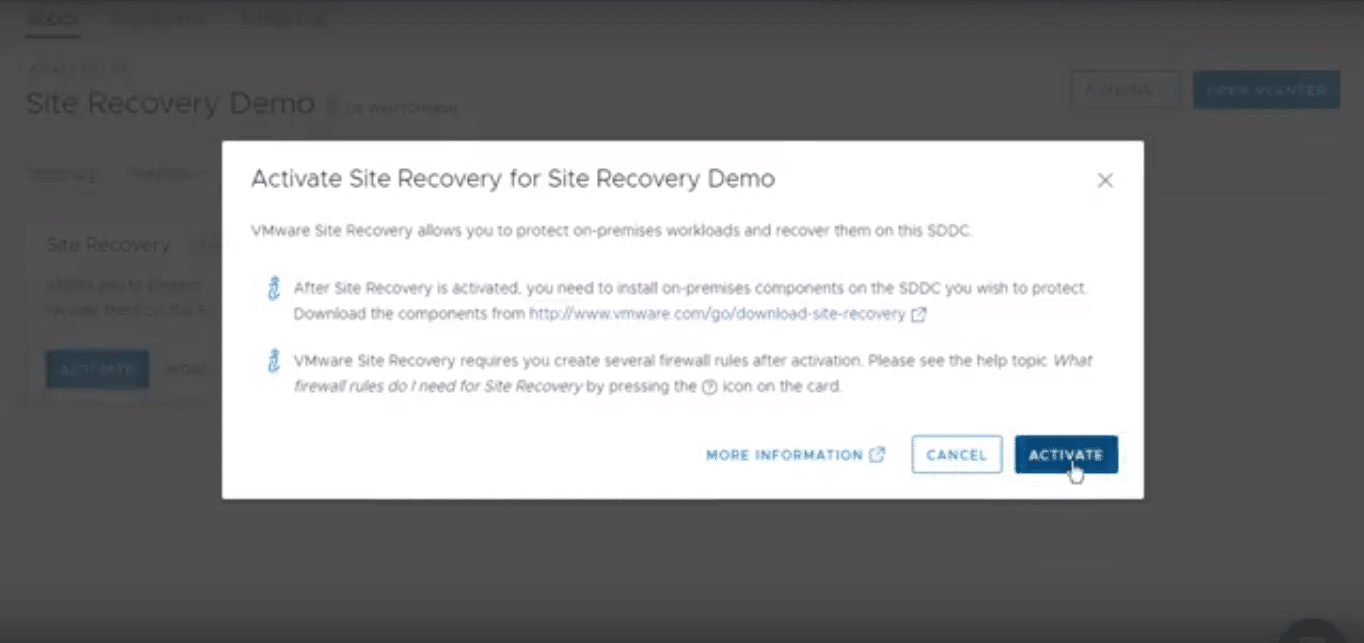
Fig 2. Site Recovery Add-on activation
Once Site recovery is activated on the VMware Cloud on AWS side, on-premise components can now be downloaded.
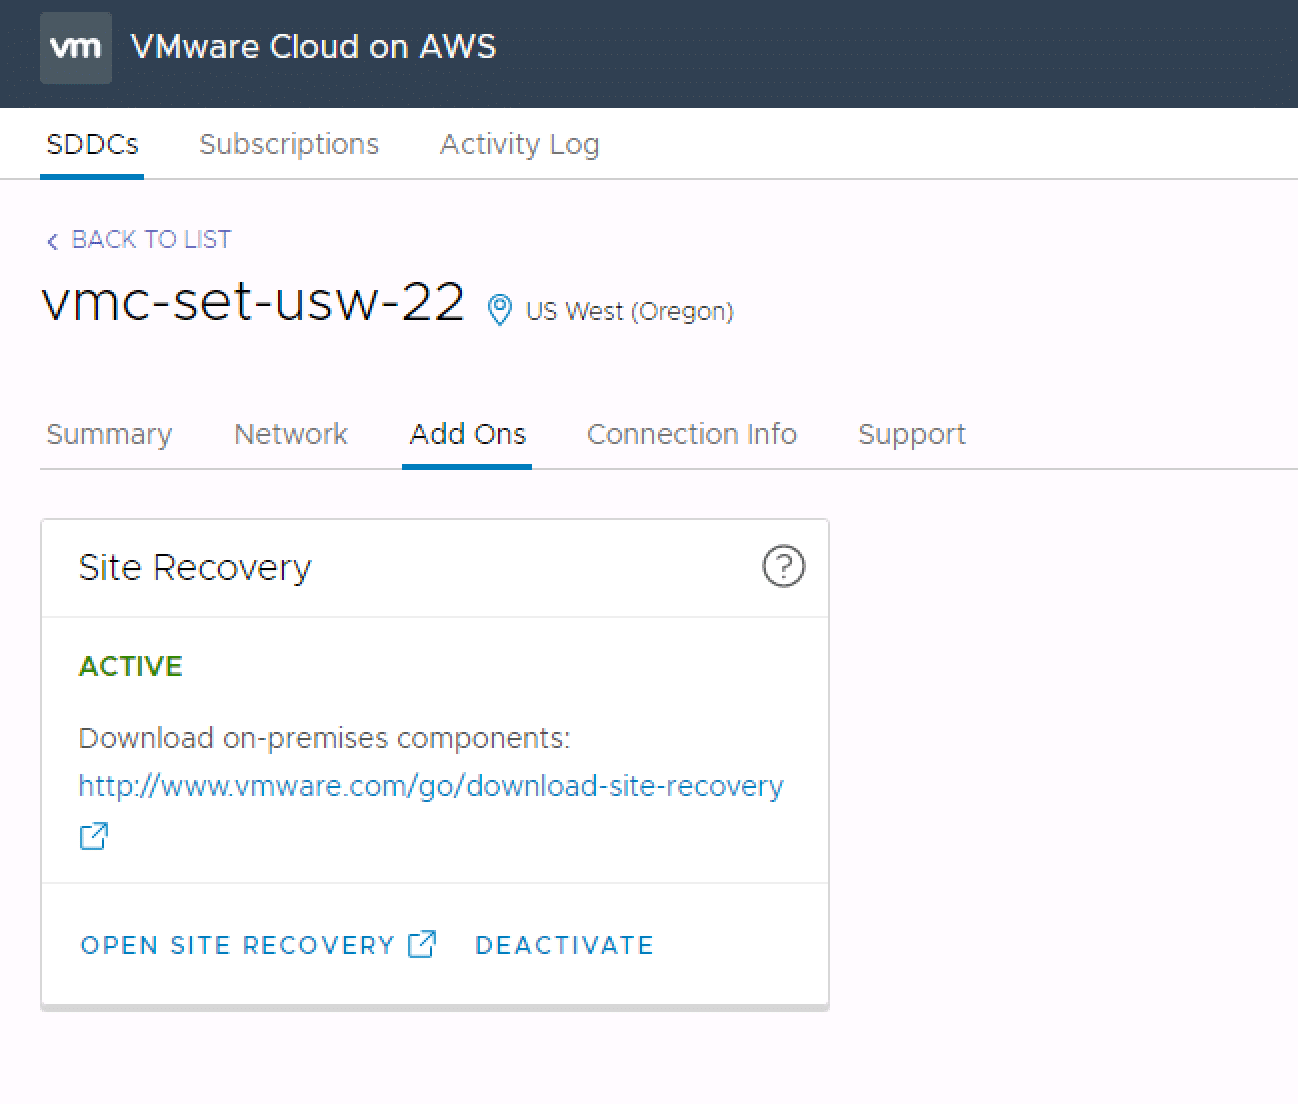
Fig 3. Site Recovery On-prem components download
Install on-premises components
If protecting an on-premises environment, deploy vSphere Replication appliance and install VMware Site Recovery Manager on a Windows server.
Deploy vSphere Replication appliance
When deploying an OVF using the vSphere Web Client, only specific OVF files that include the CERT, MF, OVF, and two VMDK, i.e. support and system VMDK are involved during deployment of s VR appliance.
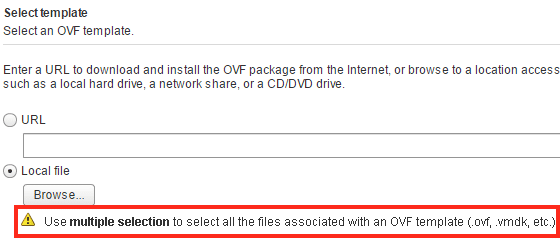
Fig 4. Vsphere Client Browse OVF files
Select the OVF files
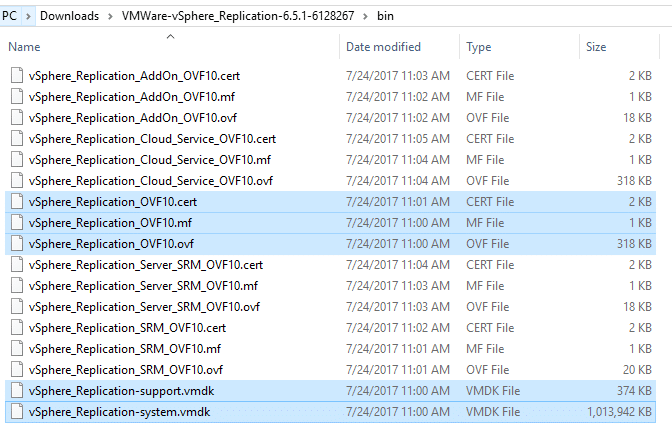
Fig 5. Location of OVF files
Select Name and location of the appliance, Datastore as the storage, choose network details. Click Finish to complete.
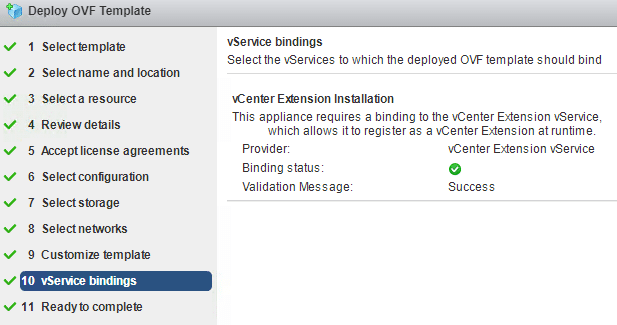
Fig 6. Deploy OVF Template details
Once VR configuration is complete, access the management URL using below format
https://[VR-IP or hostname]:5480
Login with the root credentials specified during the appliance deployment.
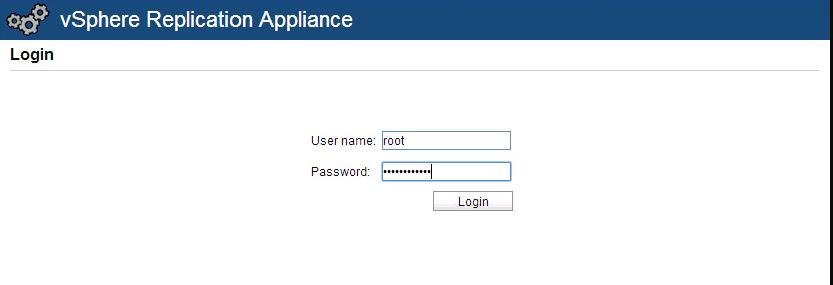
Fig 7. URL to access vSphere Replication Appliance
On vSphere Replication appliance, Click on Configuration.
Enter the FQDN of the vCenter Server in the LookupService Address and enter the Single Sign-On credentials. Click Save and Restart services
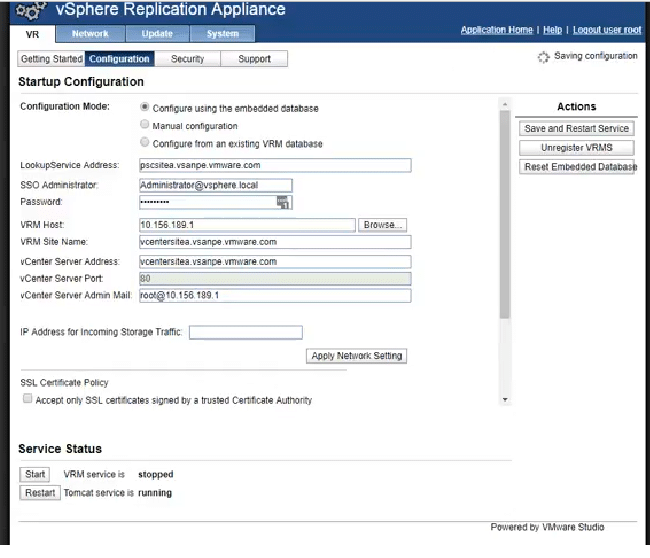
Fig 8. vSphere Replication Appliance configuration
Installation of Site Recovery Manager (SRM)
Right-click the SRM setup file, select Run as Administrator to begin VMware SRM installation.
Choose English(as preferred) as the language. Click Ok.
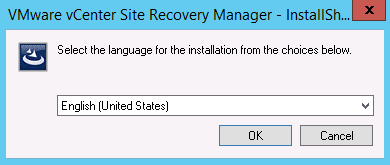
Fig 9. Language
Click Next to launch the install wizard.
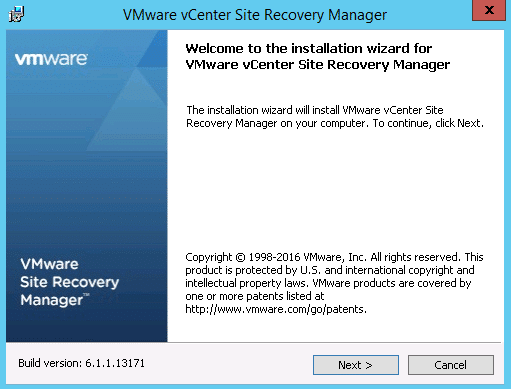
Fig 10. Site Recovery Manager installation wizard
click Next to continue.
Fig 11. VMware Copyright
Accept terms and click Next.
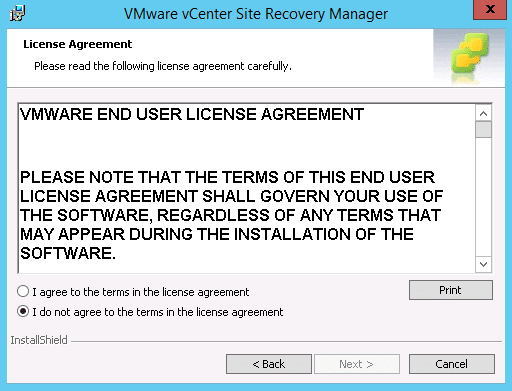
Fig 12. VMware EULA
Choose Next to install prerequisites.
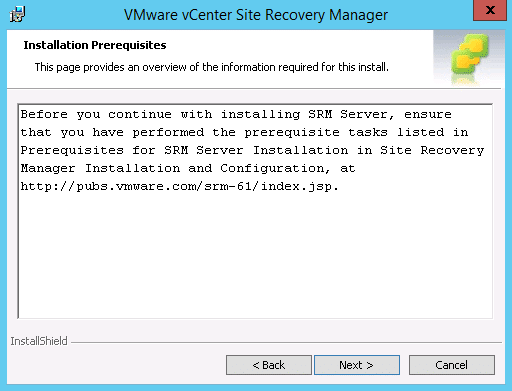
Fig 13. Installation prerequisites
Choose destination folder, click Next to continue
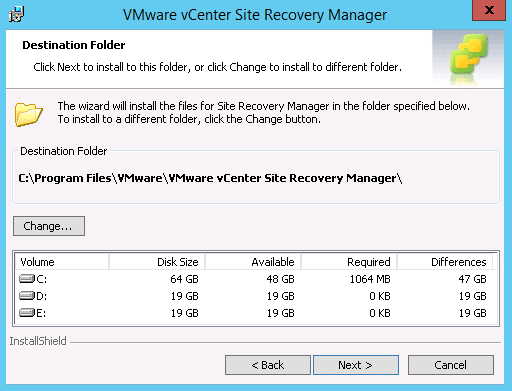
Fig 14. Installation folders
Enter IP address or FQDN of the PSC and credentials to connect to the PSC and click Next. If using an embedded database for your vCenter, enter your vCenter Server details.
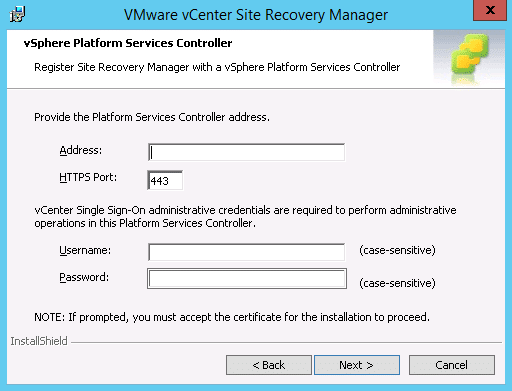
Fig 15. vSphere Replication Appliance IP address
Select the vCenter server in the drop-down menu.
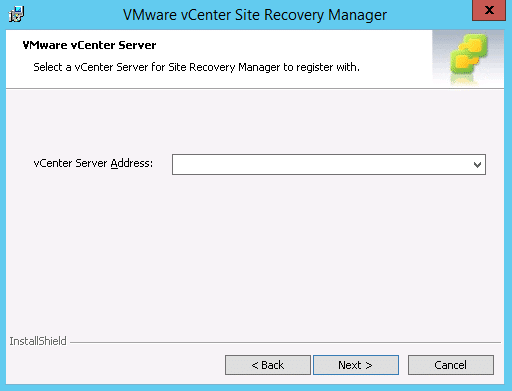
Fig 16. On-Prem vCenter server
Enter Local site name and administrator email address. Enter IP address or FQDN of the local server and click Next
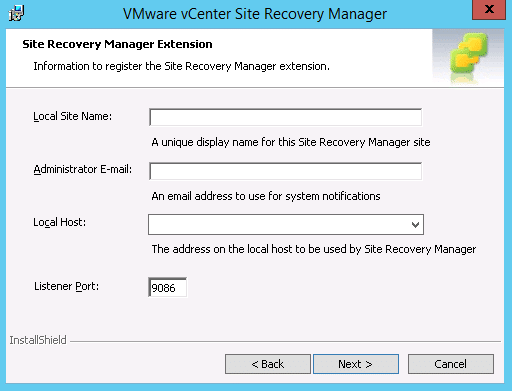
Fig 17. Site Recovery Manager unique name
For this demonstration, one protected site and recovery site is used, thus select the Default Site Recovery Manager Plug-in Identifier
For environments with multiple protected sites create a custom identifier. Click Next.
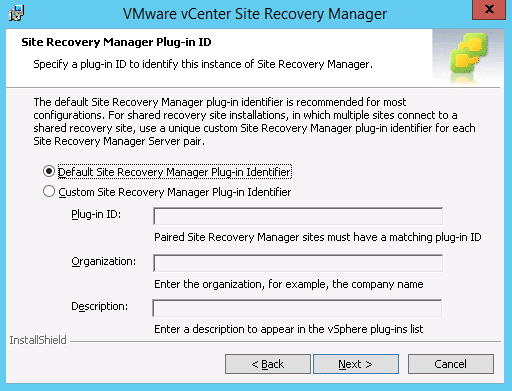
Fig 18. Site recovery manager plug-in ID
Select Automatically generate a certificate or upload one of your own if required, and click Next.
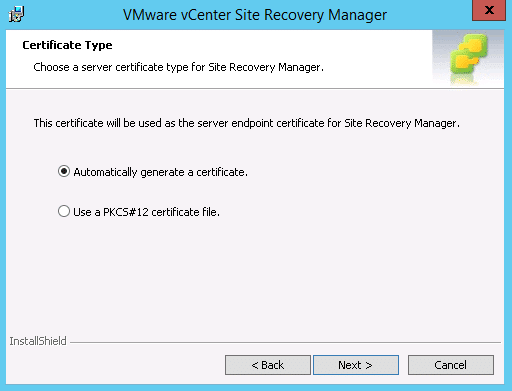
Fig 19. Type of Certificate
Select a database server. Choose embedded and click Next. If you are using an external database, reference the external data source. Click Next.
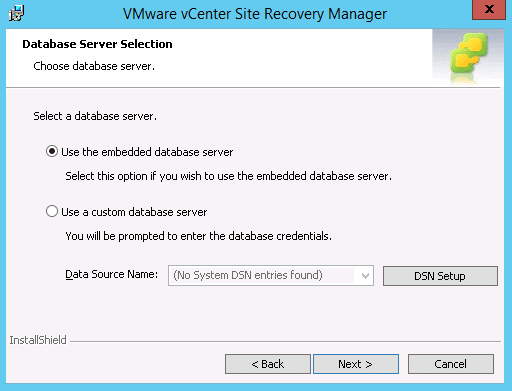
Fig 20. Database server
Recommended using the embedded database. A prompt to enter a new database name and create database credential is displayed. Click Next to continue
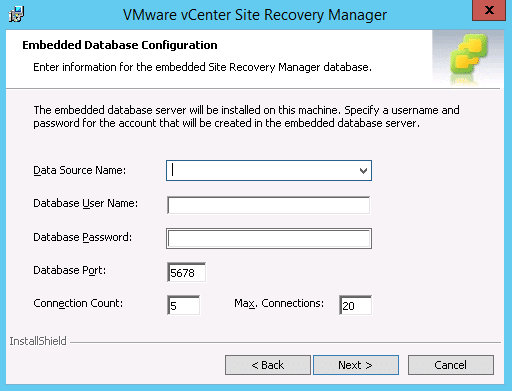
Fig 21. Embedded database connection details
Create the default account to run the SRM services then Select Next
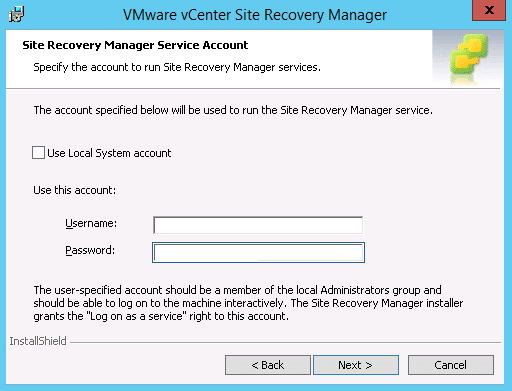
Fig 22. Site Recovery Manager service account
Click Install to begin the installation.
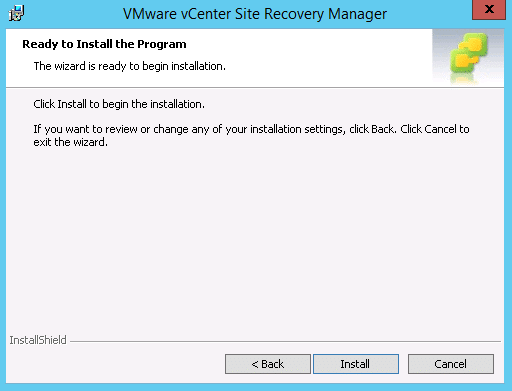
Fig 23. SRM Install
A Site Recovery Manager icon appears in the vSphere web client for each vCenter Server installed.
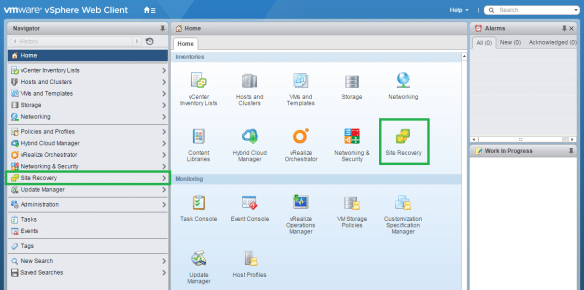
Fig 24. Site Recovery on vCenter
Create Firewall Rules
Log in to VMware Cloud on AWS, Navigate to SDDC > Network. On the Management gateway, create a new firewall rule. Create the four rules as defined below:
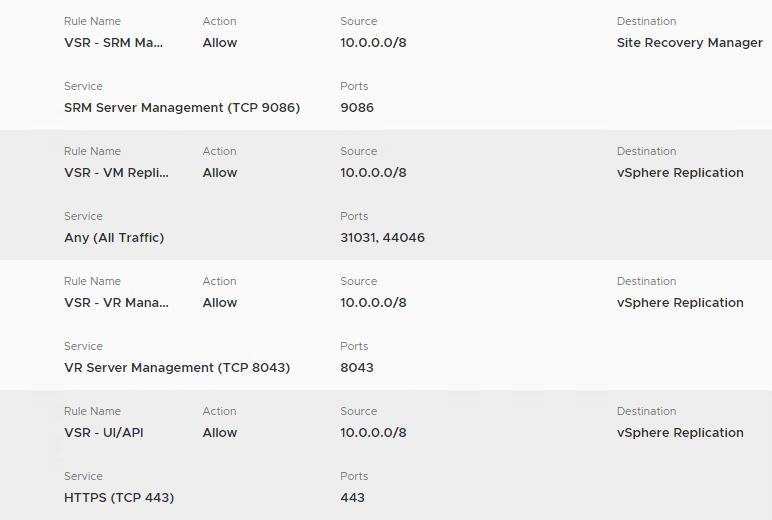
Fig 25. SDDC Firewall rules
Pair sites
Site pairing connects VMware Site Recovery and vSphere Replication at the two sites together. It enables the two sites to operate with each other.
On the Pair Site, Recovery Manager Servers Enter IP address or FQDN of PSC for the recovery site and click Next.
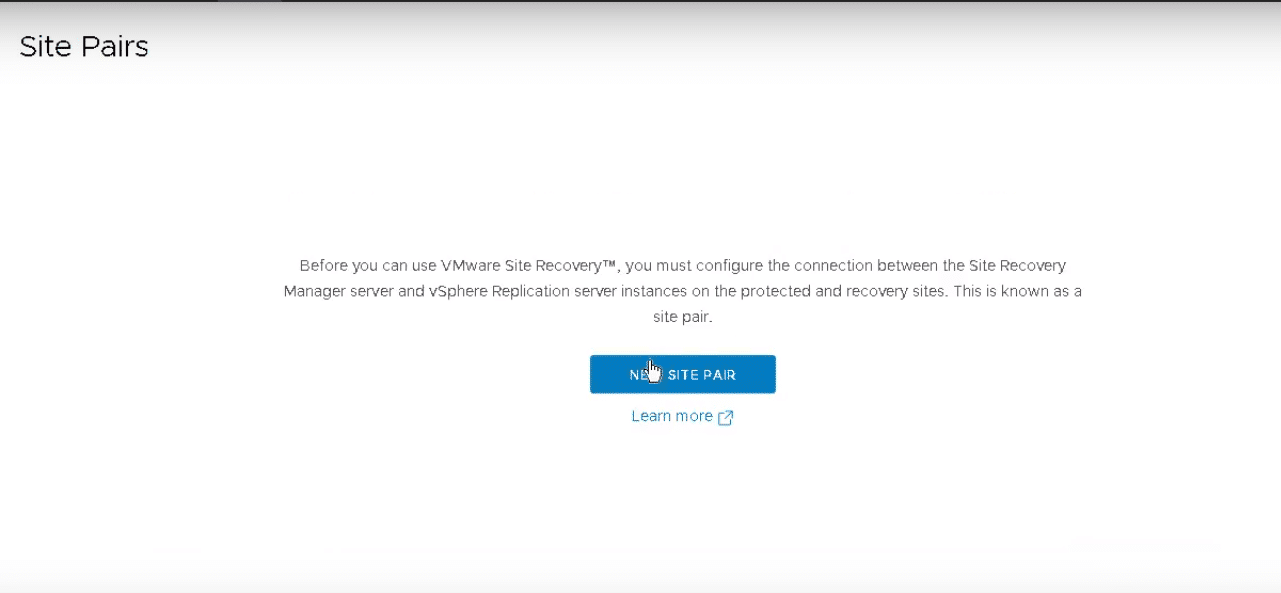
Fig 26. New site pair
Select the specific vCenter Server and enter Single Sign-On administrator credentials.
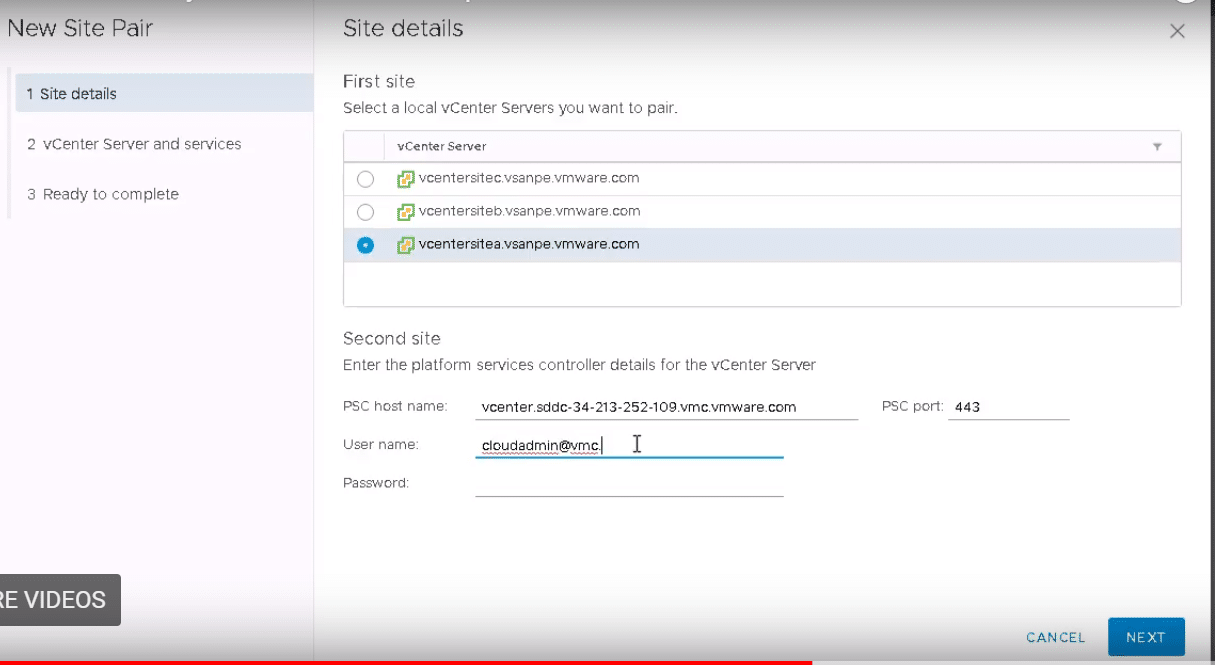
Fig 27. vCenter server to pair with
The referenced PSC for a registered SRM is checked for installation. Click Next to pair the sites together.
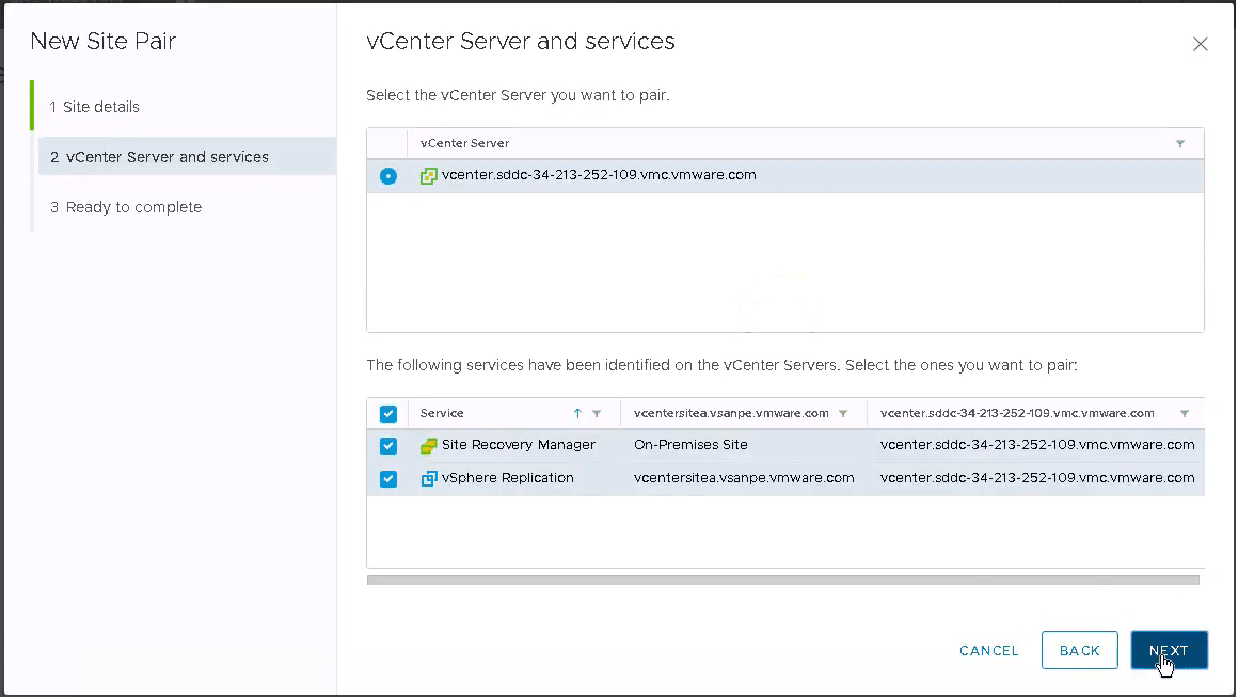
Fig 28. SDDC vCenter
Click Next to complete pairing.
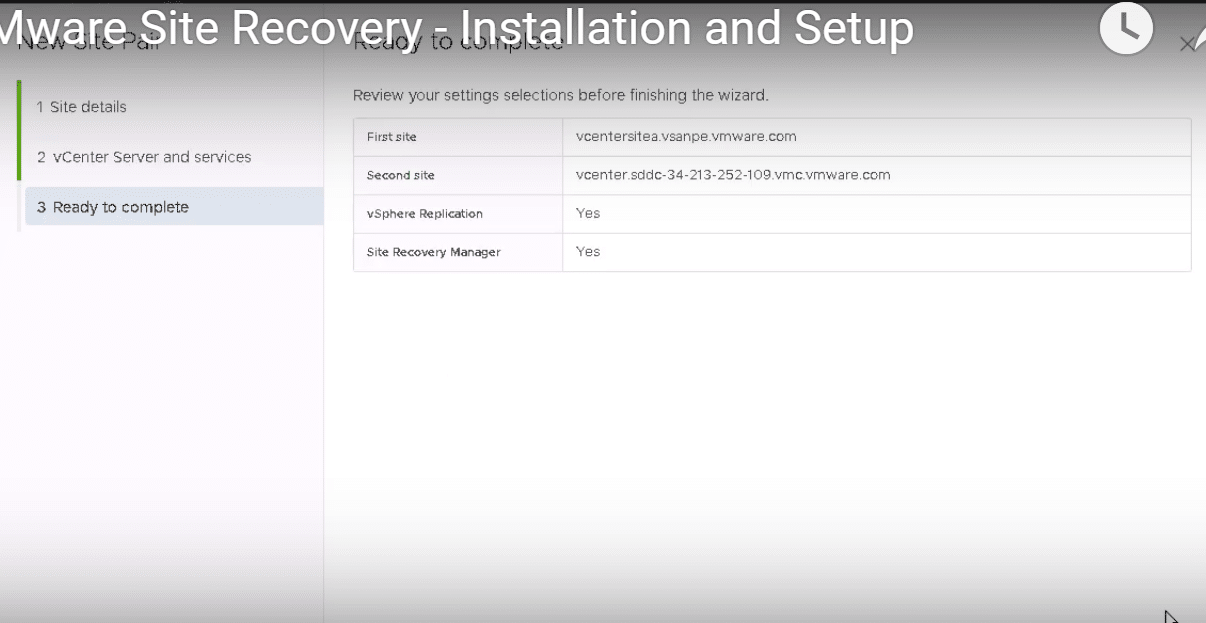
Fig 29. Summary of site pairing
The summary window displays the paired vCenter servers; on-prem and the VMware cloud SDDC.
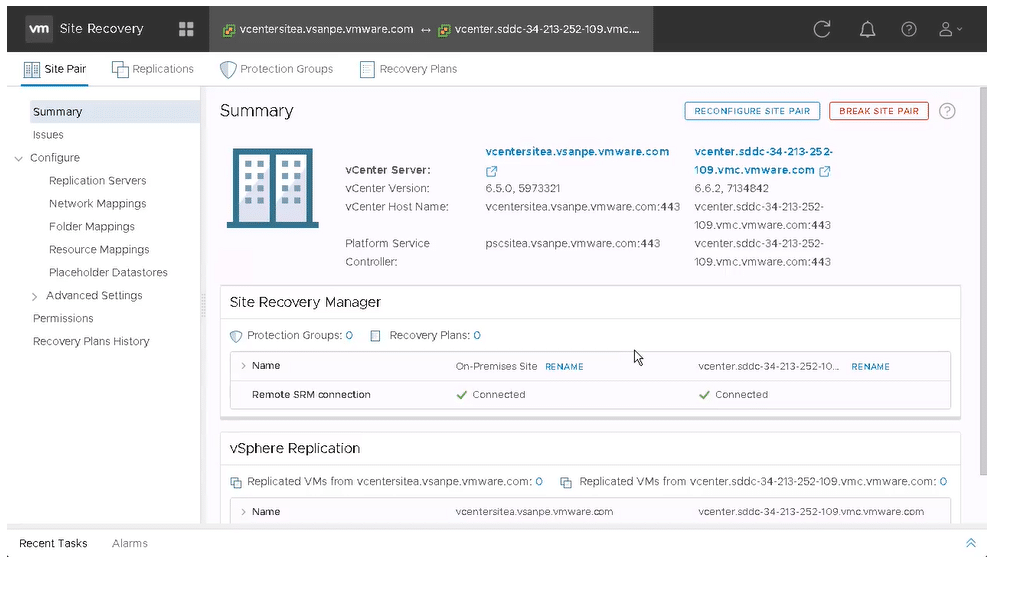
Fig 30. Summary of Site recovery configuration on SDDC
Network Mappings
- Click on New Network Mappings
- Select to map networks automatically, or to map networks at the protected site the failover site manually. Click Next.
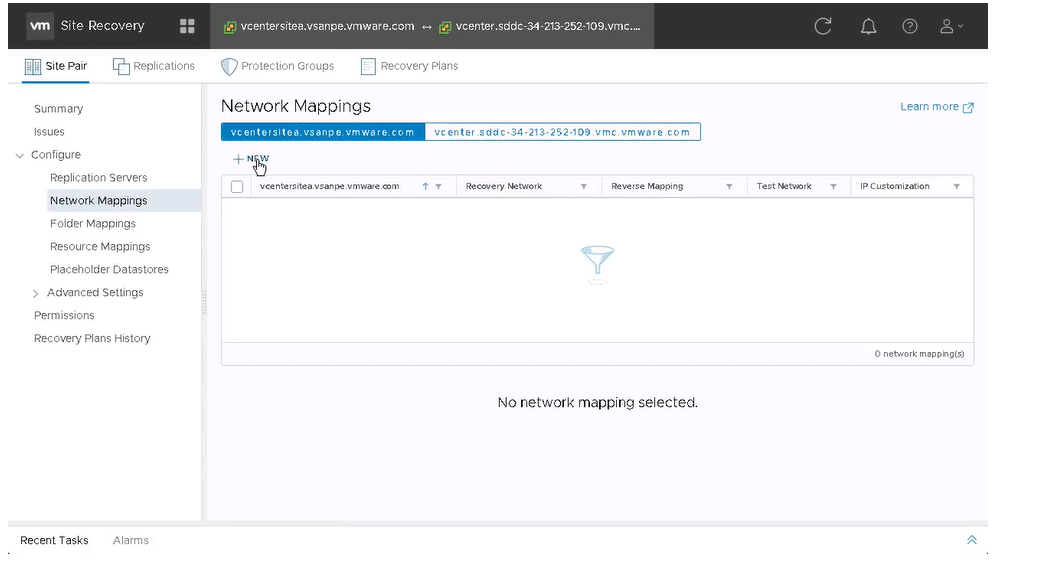
Fig 31. New Network mappings
Select the networks to map for both sites and click Next.
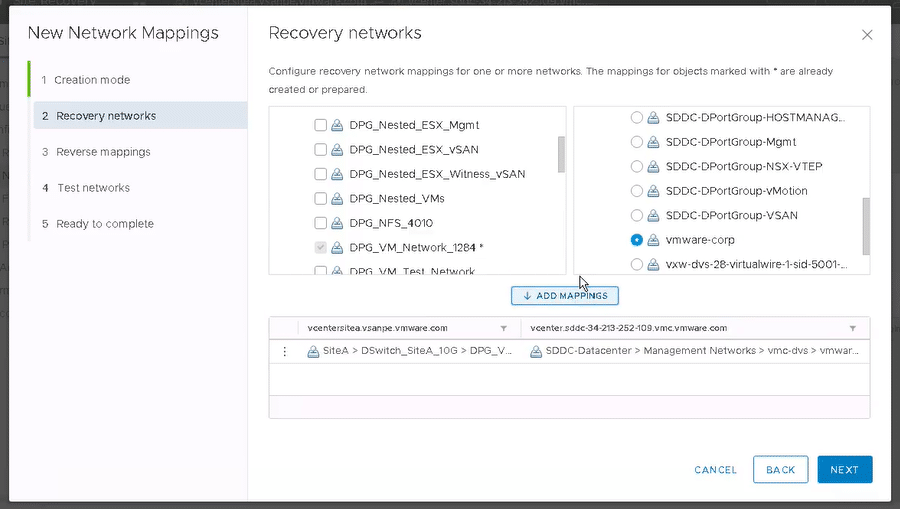
Fig 32. Recovery networks
Choose reverse mappings if required, then Next
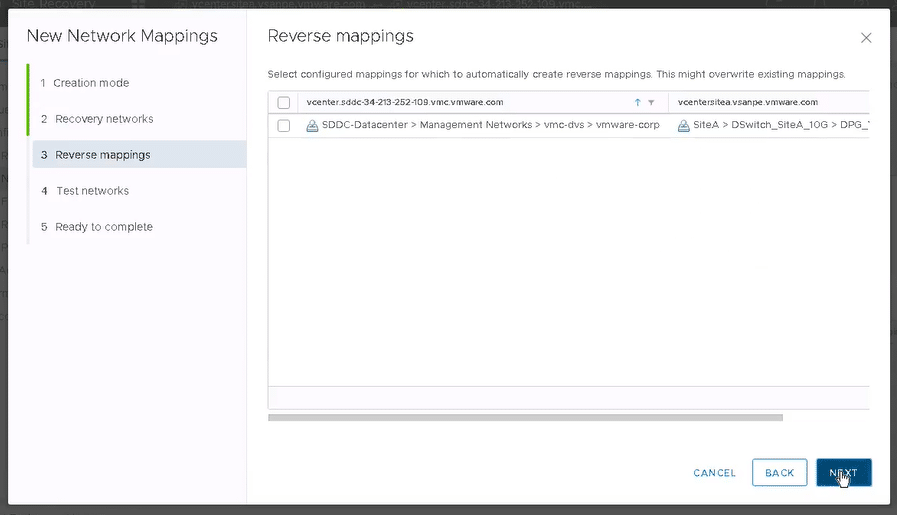
Fig 33. Reverse networks
Review the test networks, default settings unless you have a specific isolated test network you want to use. Click Next.
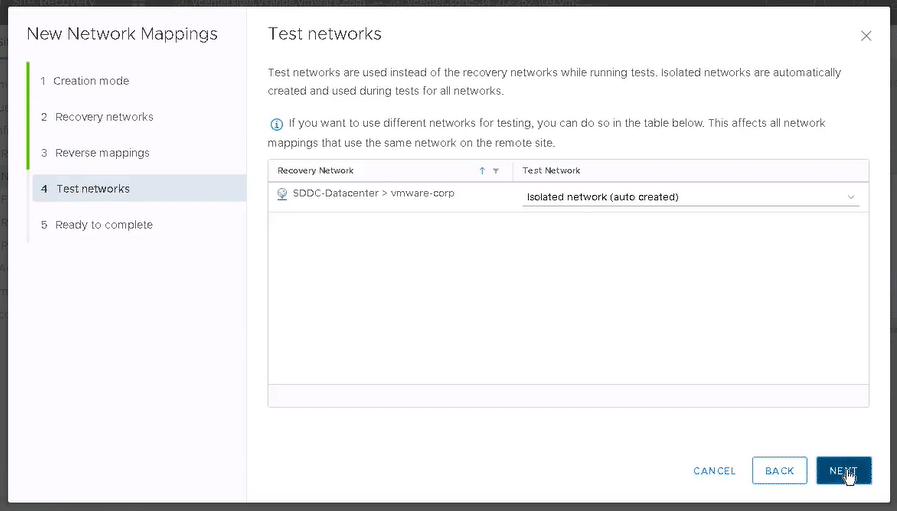
Fig 34. Test networks
Click on Finish to complete the setup.
Folder Mappings
- Click Create folder mappings.
- Click New to start Folder mappings wizard.
- Choose the folders to map for both sites and click Finish.
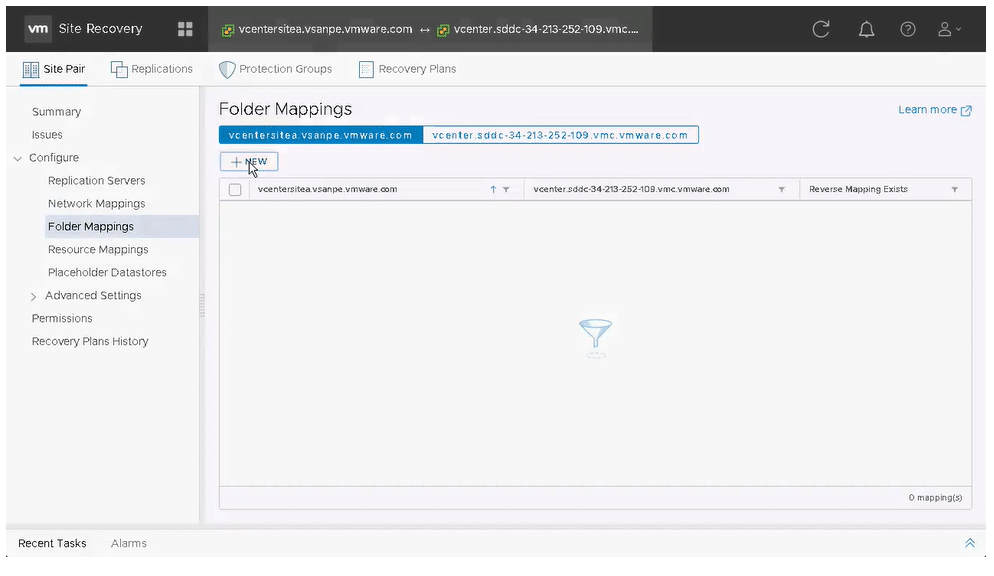
Fig 35. New folder mappings
Select automatically map folders and Click Add Mappings. Click Next.
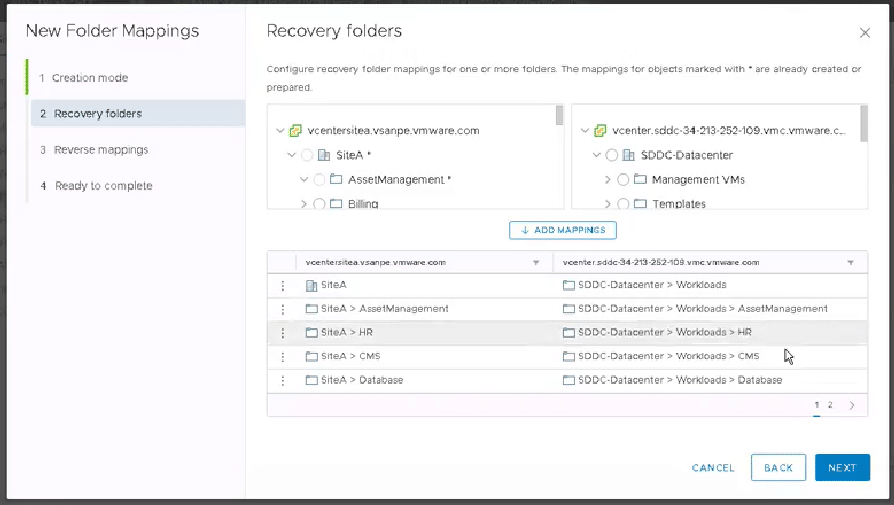
Fig 36. Match folder mappings
Configure reverse mappings by selecting all the folders. Click Next
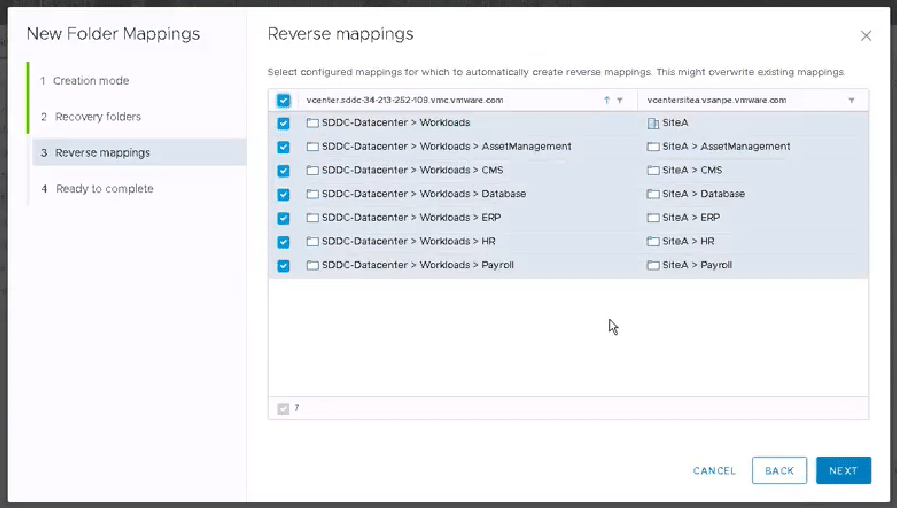
Fig 37. Reverse folder mappings
Click Finish to complete the setup.
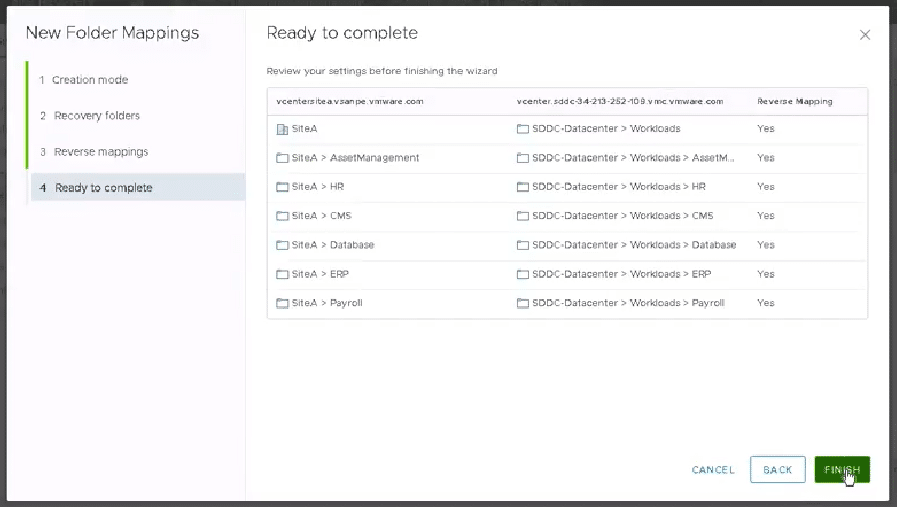
Fig 38. Folder mappings summary
Create resource mappings
- Click on New on Resource mappings window
- On the vCenter servers, select the resources from both click Add mappings and Next.
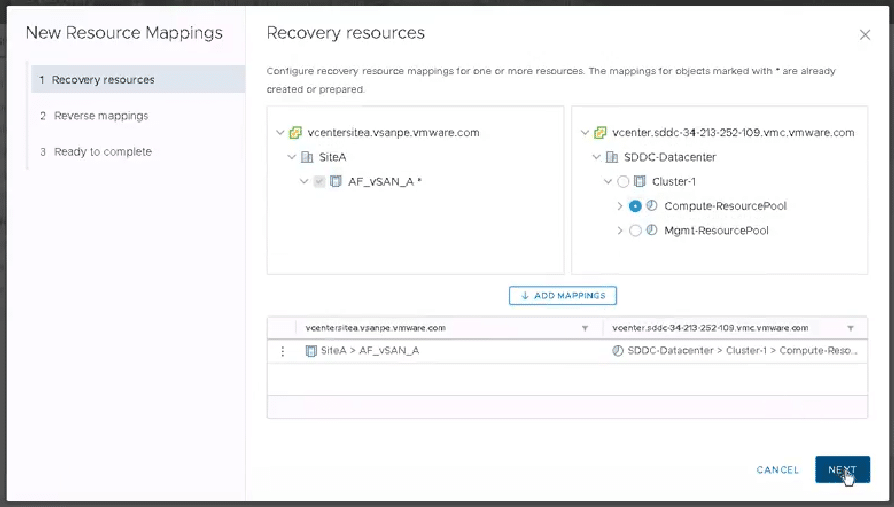
Fig 39. New resource mappings
- Choose to reverse mappings, using the tick box if required.
- Click Finish to add the resource mappings.
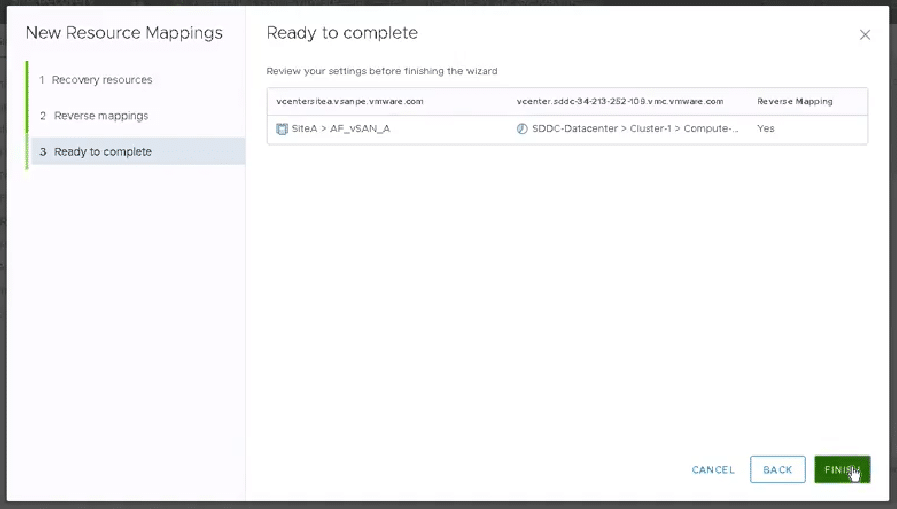
Fig 40. Summary of resource mappings
Create a Datastore Placeholder
Click New on the Placeholder Datastores
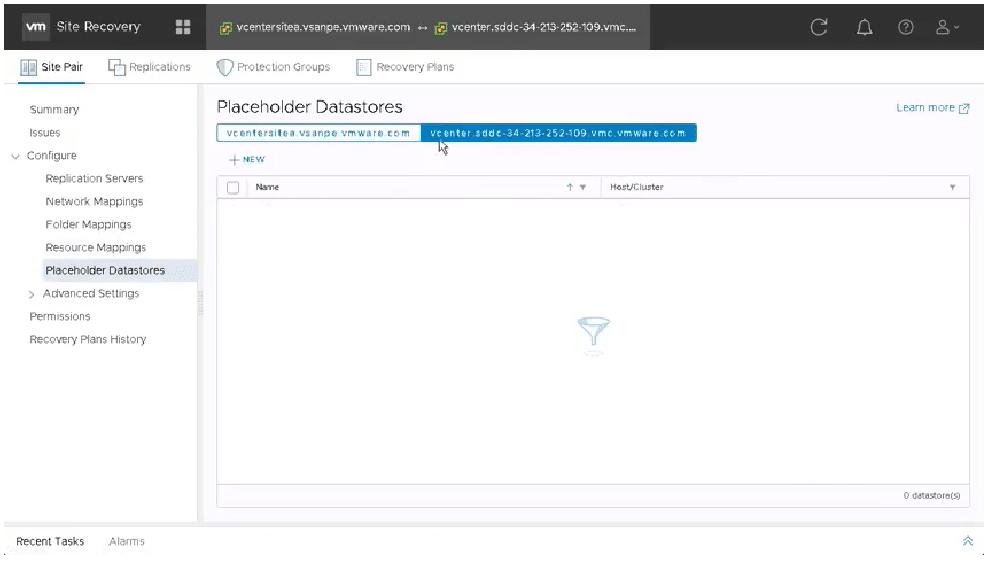
Fig 41. New Placeholder Datastore
Select the Placeholder Datastore, click Add.
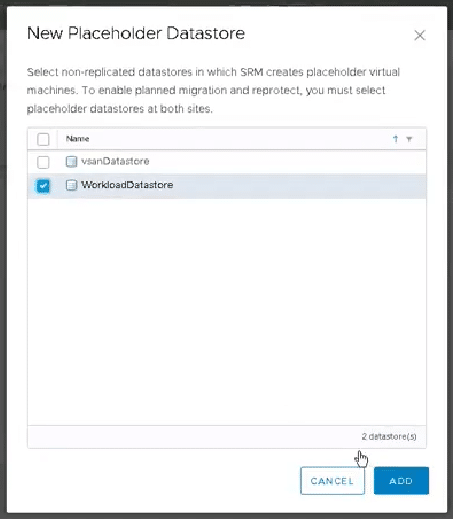
Fig 42. Summary of Placeholder Datastore
You are now ready to start replicating and protecting virtual machines.
Conclusion
Cloud is here to stay. Organizations that are shy to move to the cloud can embrace both the on-premise data center and public cloud by leveraging technologies that integrate into both worlds. Software-defined infrastructure has made this easy and eliminates the worry of application portability and lack of in-house skill set. DraaS protects on-premise data center and VMware Cloud on AWS seamlessly giving organizations a peace of mind.
References
https://esxsi.com/tag/site-recovery-manager/
https://esxsi.com/2017/03/23/srm6x/
http://www.vmwarearena.com/deploy-configure-vmware-vsphere-replication-6-5/
http://vmwarethiru.blogspot.co.ke/
https://blogs.vmware.com/virtualblocks/2017/11/29/vsr-technicaloverview/
https://blogs.vmware.com/virtualblocks/2018/03/05/new-vmware-site-recovery-demo-videos/
https://blogs.vmware.com/virtualblocks/2017/01/20/vr-65-ovf-choices/
Xieles Support can help you with the installation of any Cloud Computing or Cloud Hosting environments and related tools. Get a quote from us if you need any assistance.


