Apache Jmeter is an open source application which is used for monitoring apache web server working and its performance. It is based upon java application with graphical interface and it was developed by Stefavno Mazzocchi of the Apache software foundation.
Performance means testing a server or web application against heavy loads, several and simultaneous user traffic. Moreover JMeter is basically used for web-application or FTP applications and currently, it is applicable in JDBC database connections, FTP, LDAP, webservices,JMS,HTTP,generic TCP connection and OS native processes. The main speciality in JMeter is, it can run on any environment/workstation accepting a Java virtual machine, for instance Windows, Linux,Mac etc.
JMeter features:
Apache JMeter have following features
- Open source application
JMeter is an open source application so that, users and developers can use source code for their development.
- GUI
The GUI interface is very simple and user friendly.
- Platform independent
JMeter is purely java based application so that, it can run in any platform.
- Support various testing approach
JMeter supports testing approach like Load Testing, Distributed Testing, and Functional Testing.
- Protocol
JMeter supports protocols like HTTP, JDBC, LDAP, SOAP, JMS, and FTP.
JMeter Working
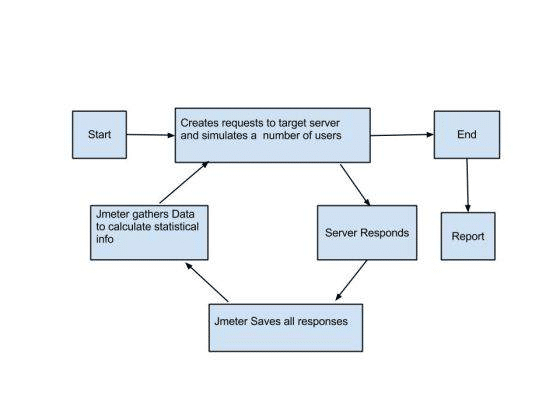
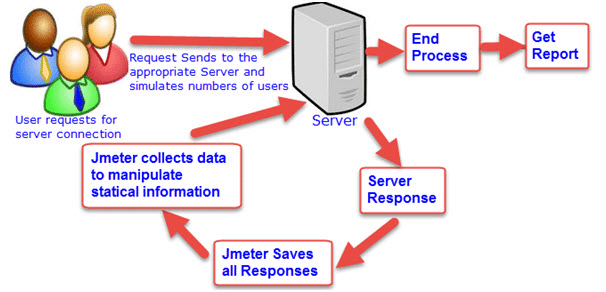
JMeter sends out bulk of requests to the server and return the results in the form of statistics that shows the functionality and performance of the target server via tables and graphs.
JMeter Installation
The following steps describes the installation of JMeter on windows.
Before installing the JMeter, first check your system have the latest version of Jave installed. You can verify it by executing the command java –version in the command line.
Download JMeter
Download the latest version of JMeter from the link http://jmeter.apache.org/download_jmeter.cgi..
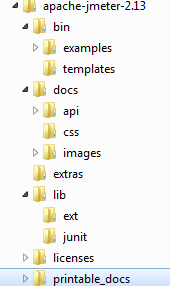
For the test, we have downloaded apache JMeter 2.13 to windows. The below picture describes the directory listing.
Run JMeter
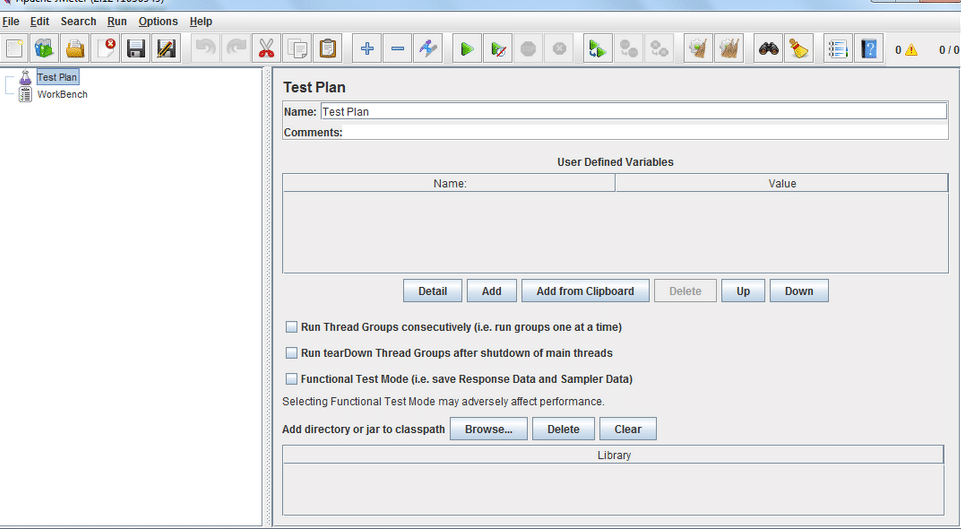
After Extracting the apache-jmeter-2.13 folder. Select the bin directory and open the jmeter.bat file, then JMeter GUI opens up.
Simple site test
We have created a test plan to test the performance of www.facebook.com website , the performance of it when 10 users sends request at a time.
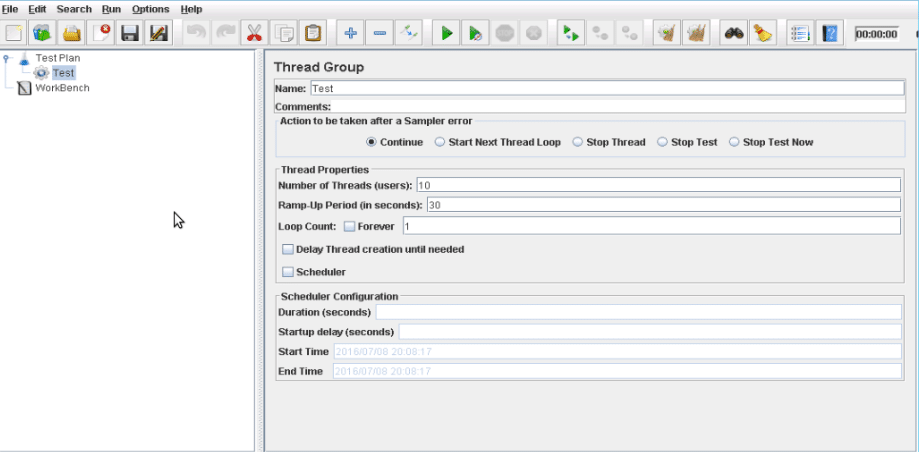
Add Thread Group
We need to add thread groups,
Test Plan -> Add -> Threads (Users) -> Thread Group
which includes all the elements like Samplers, Controllers, and Listeners. Here, we are adding the users=10, Ramp-up period is 3seconds and for all 10 users, the Ramp-up period =10*3=30seconds. Loop count =1.
If its one user at a time, set to:
No. Threads x (Page Load time + buffer)
e.g. 100 x (2s + 3s) = 500s
The buffer value ensures that one page request is finished before the next starts . Set it to a sensible figure to avoid overlaps, that will still complete in a suitable amount of time.
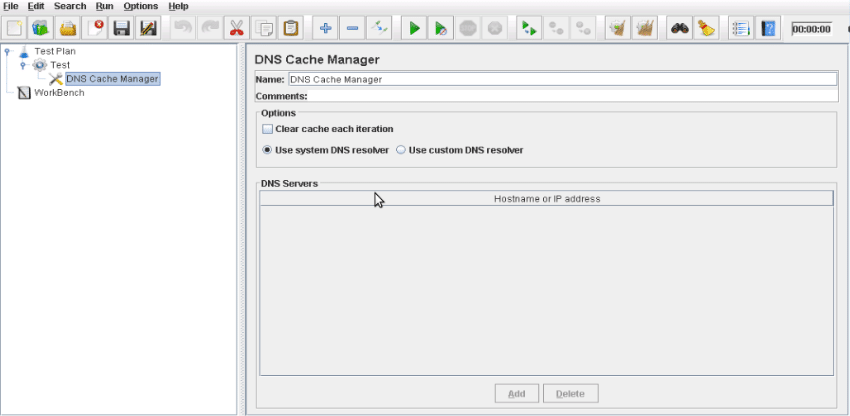
DNS Cache Manager
We can install DNS cache manager through, Test Plan ->Add ->Config element> DNS Manager
Once we enabled the DNS cache manager, we can check the site performance through the host entry method and through custom DNS resolver.
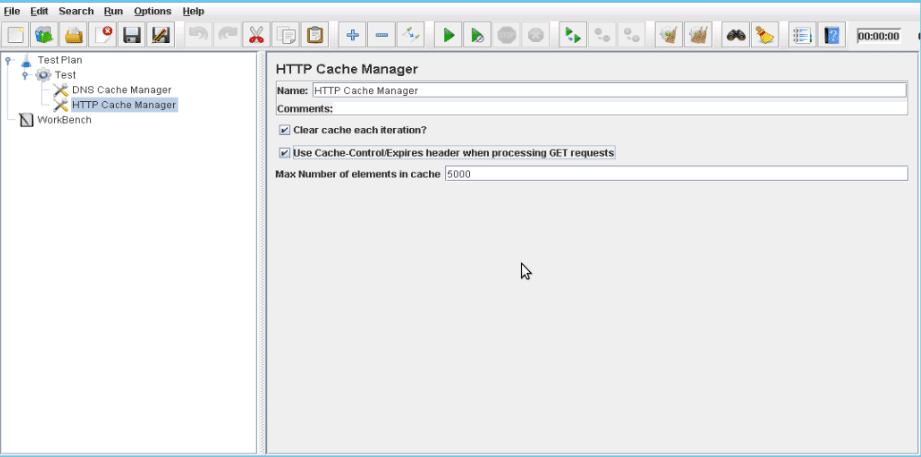
HTTP Cache Manager
We can install HTTP cache manager through, Test Plan -> Add -> Config element> HTTP Cache Manager
Clear the cache after each iteration in order to simulate new connections. Use Cache-Control/Expires = On.
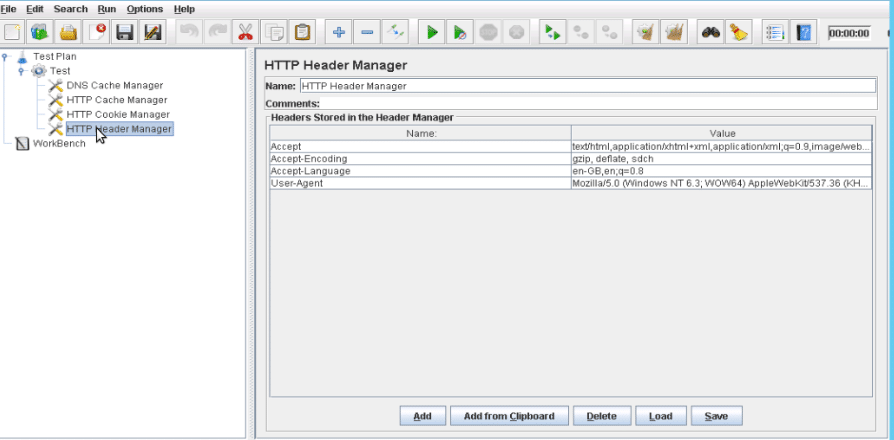
HTTP Header Manager
We can install HTTP Header manager through, Test Plan -> Add -> Config element> HTTP Header Manager.
Copy the header to clip board,
Accept:text/html,application/xhtml+xml,application/xml;q=0.9,image/webp,*/*;q=0.8
Accept-Encoding:gzip, deflate, sdch
Accept-Language:en-GB,en;q=0.8
User-Agent:Mozilla/5.0 (Windows NT 6.3; WOW64) AppleWebKit/537.36 (KHTML, like Gecko) Chrome/50.0.2661.94 Safari/537.36.
Add to the HTTP header Manager.
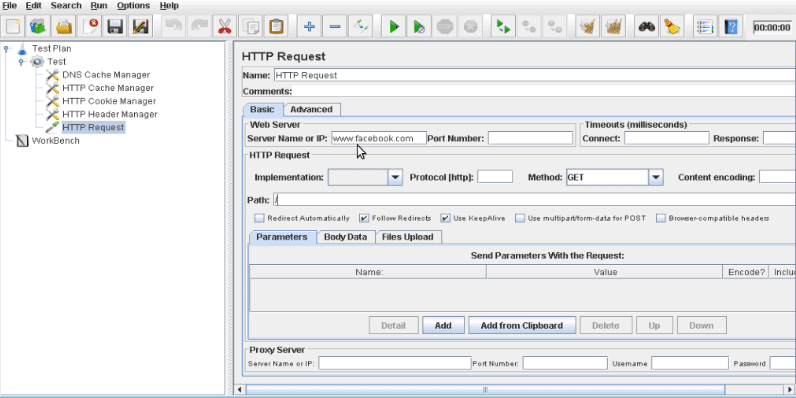
HTTP Request
Add HTTP Request Sampler by choosing Add > Sampler > HTTP request option. It will add one empty HTTP Request Sampler under the Thread Group (Users) node.
Server Name or IP – Here, we have to type the web server name ie. www.facebook.com
(http:// part is not written this is only the name of the server or its IP)
Protocol –We will keep this blank, which means we want HTTP as the protocol.
Path – We will type path as / (slash). It means we want the root page of the server.
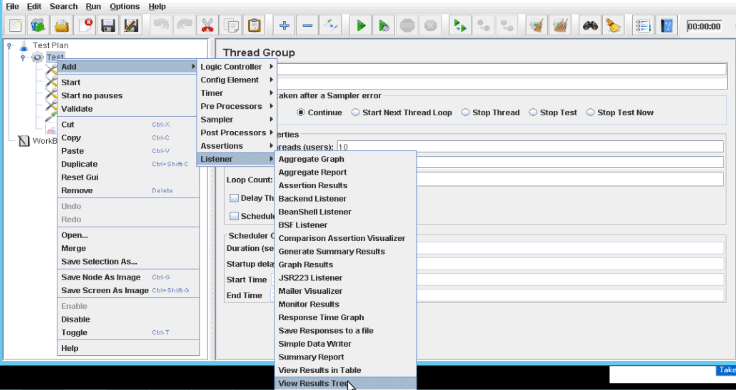
Add Listener
We can add listeners to check the site performance. We can view the test result in Tree form or in Table formate.
To add a listener> Right-click the Thread Group > Choose Add > Listener > View Results Tree option.
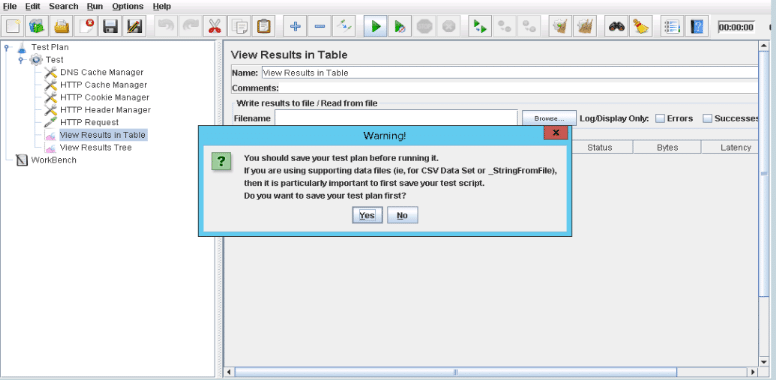
Run the Test Plan
We have successfully configured the Apache JMeter and it is ready to test. Let us execute the test plan. With the configuration of the Thread Group (Users). During test process JMeter will ask to save the result, so save it.
View the Output
We have kept the setting of the thread group for 10 users and loop for 1 time (run only one time). The result is show in form of Tree and Tables.
Tables

The average sample time is 617ms
Deviation is 90


