Amazon Lightsail is a service provided by AWS, and Lightsail instance is a virtual private server (VPS) that lives in the AWS Cloud. Lightsail is a combination of computing power, storage, and networking capabilities for new or less experienced cloud users to launch and maintain websites and applications in the cloud. cPanel & WHM are the best web hosting platform, where cPanel’s WebHost Manager (WHM) provides administrative control of your VPS. Here, we will go through the steps of launching an Amazon Lightsail Instance.
Login to Amazon Lightsail
Step 1. Open the web browser and navigate to the Amazon Lightsail website.
Step 2: Log in to your AWS account. If you do not have one, create and log in with the credentials.
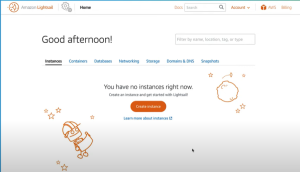
Now you can see the instance page, where you can view all the cPanel and WHM instances that you have already created.
Configure and launch a cPanel and WHM instance
Step 1. Click on Create instance.
Step 2. Select a location by selecting Change AWS Region and Availability Zone under the Instance location. AWS automatically suggests a region, but selecting a region near you or your customers is better.
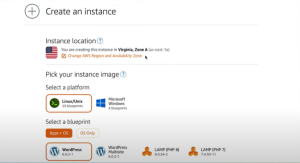
Step 3. Select Linux/Unix under Select a platform in the Pick your Instance image section.
Step 4. Under Select a blueprint, select cPanel & WHM for Linux. You will need a valid license to use cPanel & WHM.
Step 5. In the Identify your instance section, give a name to your instance. And this name will be permanent.
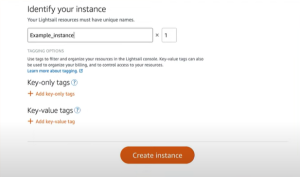
You can add tags for your instance by selecting Key-only tags or Key-value tags.
Step 6. Click on Create instance.
This will automatically go back to the instance page, where you can see the new instance. Once the instance is created, the system will automatically install cPanel and WHM in the background, which may take 10-15 minutes.
Assign a static IP address to the instance
Amazon automatically assigns a dynamic IP address to each instance. If you stop and restart the instance the IP address will change. To avoid this assign a static IP address to your instance.
Step 1. On the instance page, select the Networking tab.
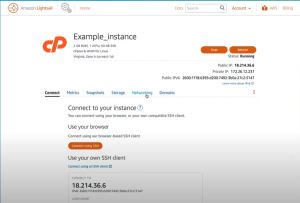
Step 2. Under PUBLIC IP, select Attach static IP. This will take you to the window where you can name the static IP address and attach it to your instance.
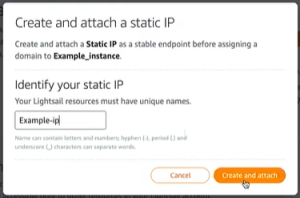
Step 3. After providing the details, click on Create and Attach.
Set up a root password
Step 1. On the Instances page, click on the instance name.
Step 2. Click the Connect tab.
Step 3. Click Connect using SSH. The Lightsail terminal interface will appear.
Step 4. Enter the command below:
sudo passwd
Step 5. Enter a password.
Step 6. Enter your password again.
Log in to WHM
Step 1. Copy the IP address from the instance page.
Step 2. Open a new browser window and navigate to the address below.
https://exampleIP:2087
Here, “exampleIP” is the IP address that you have copied.
Now you can see the WHM login page for your instance.

Step 3. Login using your root username and password.
Step 4. Accept the terms and then activate your trial license.
Conclusion
Launching an Amazon Lightsail is a quick and easy setup. And it is simple as running an application like WordPress. After the instance starts running, you can connect to it via SSH without leaving Lightsail.


